Look Outside

Look Outside

981 个评价
Look Outside Guide - 100% Achievements, Door Encounters, Crafting, Hidden Secrets, & More!
由 Llamakazi 制作
[v2.0 - New Achievements Complete! - Current Progress: 152 / 152 (100%)]
A Look Outside guide on how to get 100% Achievements, all possible Door Encounters, a full list of Crafting Recipes, Hidden Secrets, and just some extra helpful notes and guidance!
97
30
61
6
18
13
5
8
10
8
2
7
5
4
4
4
2
3
2
2
   
奖励
收藏
已收藏
取消收藏
Introduction


Hello there! I didn't see a guide posted for this yet, and there's been a ton of questions asked about these (and many more) so I thought I'd get the ball rolling to help each other out with this absolute gem!


Note: There will absolutely be spoilers in here, although I will try to do my best to avoid you accidentally seeing major story beats and reveals! Anything worth hiding for the sake of discovery will be located behind spoiler tags like this one!

If you don't care about spoilers and just want to reveal them all, then install the SteamDB Extension here![steamdb.info]

A button will then appear at the top that allows you to bypass every single one. It will look like this:


Accessibility Bonus: you will be able to do a Ctrl + F text search on ALL of the spoiler text, in addition to all regular text, if you've been using that to navigate quickly.


...and an urge to 100% all of the achievements...


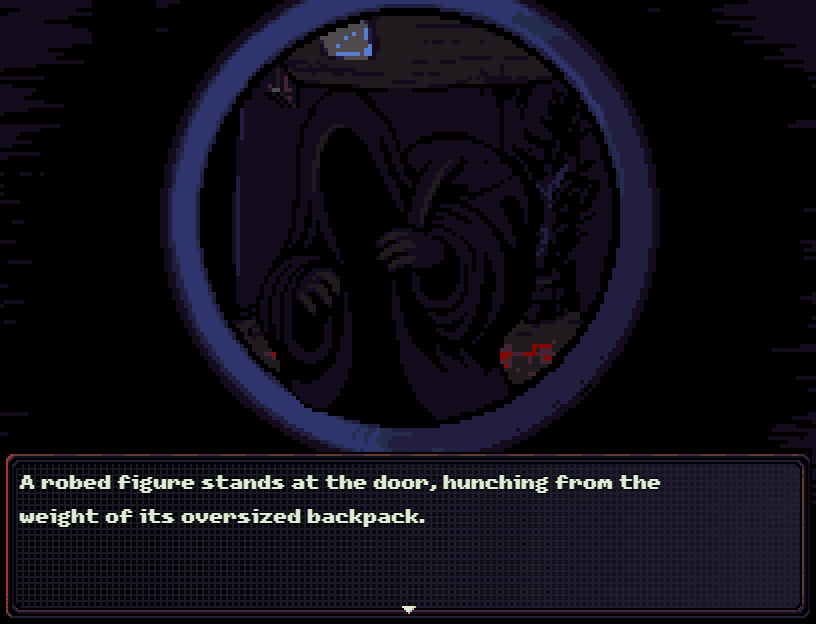
This could be you!

Current Status: ALL 92 v1.0 Achievements and ALL 60 v2.0 Achievements have officially been recorded & written with detailed instructions!

Current Progress: 152 / 152 (100%)


If you are so inclined, you can hit the Favorite & Like buttons up top to easily come back and consult this guide in the future. It also helps with overall visibility!
Achievements - Progress & Collection
Exploring

Stepped out of your home.

This one's pretty simple and most likely your first achievement (unless you were to Look Outside perhaps...?) Simply step outside of your apartment door then start exploring!


Down the stairs

Reached the second floor.

Grab the {Padlock Key} after defeating the wounded neighbor (your first enemy) then use it to unlock the stairwell at the east end of the hall. Walk downstairs to 2F!


Labyrinth

Reached the first floor.

You can reach 1F through Lyle's Bathroom in Apt 21 on 2F.


Terra Firma

Reached the ground floor.

Place the {Earth Disc} and the {Mars Disc} in the 2 round slots in the stairwell to access the Ground Floor (GF). Both Discs can be found on 1F.


Depths

Reached the basement.

Get the {Basement Key} from the Landlord's Apartment on the Ground Floor (GF), then use it in the B1 stairwell.


Shortcut

Fixed the Elevator

Kill the Elevator Thing in the Basement (B1), located just past the parking garage, which fixes the elevator.


Exposure

Reached the roof.

After providing 4 offerings to Jasper, you'll get the {Roof Access Key} (usable in the 3F stairwell) and some {Dark Robes}. There's no going back once you're up there, so plan accordingly!


One day at a time

Survived one day.

Simply get far enough into the game that some time passes and your character can sleep in his bed and progress to the next day. If you try to go to bed too early it'll state that "It's way too early to sleep."


Game Collector

Found 10 game cartridges.

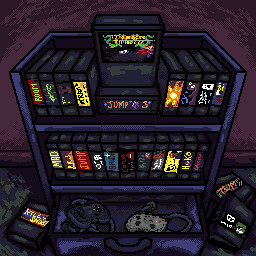
You'll start with 3 video games on your shelf, so you'll have to find an additional 7 to trigger this one!

See the "Complete Video Game & Skills List" section below for how to find each!


Completionist

Found all game cartridges.

You'll start with 3 video games on your shelf, so you'll have to find an additional 17 (20 total) to trigger this one!

See the "Complete Video Game & Skills List" section below for how to find each!


Rank A

Complete the game with a Rank of at least A.

"End Results" Score Contributors & Point Values
Baseline Points:
Ending - Promise +2000pts, True Final Ending/XIN-AMON/Perfect Ritual (Truth OR Denial)/Unity/Mask +1000pts, Flawed Ritual/No Going Back/Screaming Sky/Words of Power +500pts, Eternity +200pts, Failed Ritual +100pts
Days Elapsed - Starts at 1550pts, -200pts per day passed
Friends - +200pts per friend recruited
Bosses Defeated - +100pts per boss defeated


Bonus Points from Challenges:
Miasma - Did not shower once. +10pts
Insomnia - Did not sleep once. +500pts
Ascetic - Did not eat any meals. +500pts
Loner - Did not make any friends. +500pts
Gamersbane - Did not play any video games. +500pts
Long Weekend - Beat the game in 3 days or less. +1000pts
Cold Shoulder - Only spoke to Sybil once. +2000pts
Cold Shoulder - You didn't save the game once. +4000pts


Difficulty Multipliers:
Explorer Mode (aka Easy Mode) - 1x
Survivor Mode (aka Normal Mode) - 2x
Cursed Mode (aka Hard Mode) - 3x


For A Rank, you must get 6000 or more points in the final tally.


Rank S

Complete the game with a Rank of at least S.

See the "Rank A" achievement description above for the stats that contribute directly to your final tally.

For S Rank, you must get 9000 or more points in the final tally.


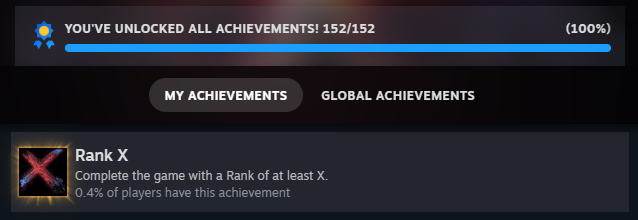
Rank X

Complete the game with a Rank of at least X.

See the "Rank A" achievement description above for the stats that contribute directly to your final tally.

For X Rank, you must get 15000 or more points in the final tally. I managed to trigger this one (and the Rank A/S achievements simultaneously) by performing a Perfect Ritual on Cursed Mode, with 29 bosses defeated, and a final tally of 16800 Points!


Where it all began

Enter the depths of apartment 12.

Speak with all 4 Astronomers until you find out that Sybil was a fellow Astronomer, and was the first one that actually saw the Visitor. Once you have this information, confront Jasper about Sybil and he'll hand over {Jasper's Key}.

Take the key over to F1 Apt 12 (i.e. the only door on F1 that requires {Herbicide} to open) which can be found right across from the Mouth Monster in Apt 13. In the back of the room behind the {Herbicide} door will be a barely visible place where you can use the key. Enter for this achievement!


Insight

Shake some memories loose.

Follow the steps above for the "Where it all began" achievement to enter Apt 12 on F1. In the main living room of Apt 12, look where the growth on the ground is gravitating towards on the west wall. You will find a hidden door there that you can reveal with {Herbicide}.

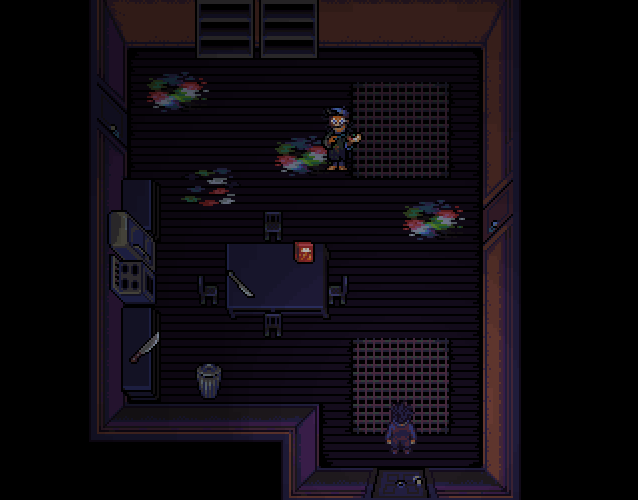
The hallway behind the hidden door there will be a hallway with a keypad. You can find the code from Sybil's Notes in the kitchen. The code will be 187552.

Inside the Planetarium, you'll need to insert planetary Discs in this order, starting at the center: Sun, Mercury, Venus, Earth, Mars, Jupiter, Saturn, Uranus, & Neptune.

In the southern room that opens, pick up the {Telescope Pieces}. Also retrieve the {Apt 35 Key} in the Planetarium's large pillar room. Take the telescope pieces to Jasper to repair them. Give the {Telescope} to Sybil in her Apt 35 on F3.


Cursed Ritual

Complete a perfect ritual in Cursed Mode

Simply meet the requirements for a Perfect Ritual (see the "Achievements - Endings" section below) in the Cursed (Hard) Mode difficulty. The achievement should trigger right before the credits roll!
Achievements - Party Recruitment
Teeth Child

Welcomed Joel into your home.

Joel can be found in Apt 32 across from you starting on Day 2. He'll be in the bathroom in the upper left.

There's a kind of disposition "how much can I trust you?" system at play here, and telling him you're "his neighbor" puts him the most at ease. You can still recruit him IF you choose the other options, but it'll be more difficult. Be sure to ask him "how he's doing" and to "give him a hug" to get massive boosts in Joel's trust!

When he transforms, he'll lose control and attack you! Escape, then grab the {Teddy Bear} "Fuzzy" in the bedroom, unless you've already picked it up.

Use the {Teddy Bear} on him. Give him a hug (ouch), then you'll get the {Door Knob}, which you can use to progress to the rest of the apartment.

If you try speaking with Joel again he'll mention his mom, but doesn't do anything else yet. Find his mutated mother, Madison. You do NOT have to defeat her, just get into combat, then escape.

Talk to Joel again, now instead of talking about his mom, now he talks about helping his sister, who has mutated into "Baby Teeth" (she will only ambush you on the way out if you've looted the fridge in the kitchen)

Say to Joel "You can't stay here..." and "You can come with me." to have him immediately join your party if he trusts you enough!

Bonus (extra rare event): Hug Joel after giving him Fuzzy (the teddy bear) when your main character is at VERY low HP for an extra gruesome unique death! There's no achievement for this one, but it's great if you want to be creeped out!

Warning: if you wait too long after his apartment opens, it will become corrupted and Joel will be too far gone to recruit. So be quick about it!

You can also check out this brief video that shows how to easily recruit Joel, as well as the interactions with the whole Teeth Family and Sam's mirror thoughts afterwards.


Grinner

Welcomed Leigh into your home.

On F2 at the end of the hall, you'll pick up the {Apartment 21 Key} then shortly after you'll get chased by the Grinning Beast. Defeat her instead of running away.

This enemy is weak to [Slash] & [Pierce] attacks! You can use the {Pool Cue} at the bottom of the stairwell for massive damage, using it's [Impale] Skill. Afterwards, you'll be able to go into the previously boarded up room across from Eugene's Shop.

You'll find Leigh inside, who is... surprisingly friendly? Accept her request to hang out, and she'll officially join your party!


Creep

Welcomed Dan into your home.

Will randomly show up at your door and ask to come in.


Maniac

Welcomed Hellen into your home.

Will randomly show up at your door and ask to come in.


Rodent

Welcomed Rat into your home.

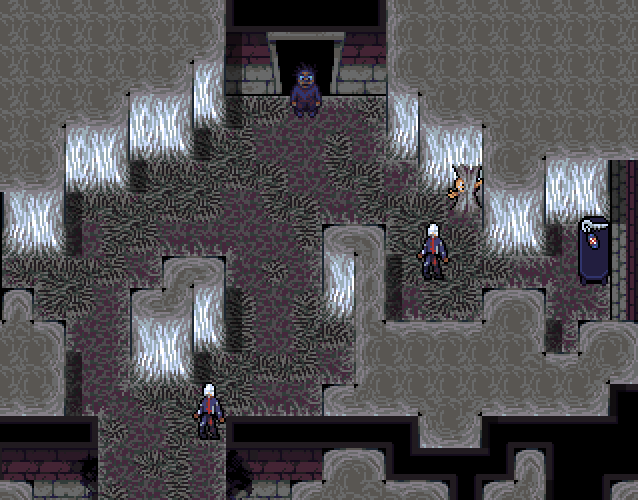
You'll find the Rat Baby in a crib in an apartment on 1F. Be sure to take it with you before leaving!

There will be another room, Apt 13 on 1F, with a Mouth Monster on the wall that wants to be fed a child. It will refuse to let you leave until you satisfy it's request.

You can refuse this and offer it one of your arms instead (losing either melee or ranged weapon capabilities) The Rat Baby will then move in to your apartment and you can care for it! After enough TLC it can be recruited as a full fledged party member!


Vermin

Welcomed Roaches into your home.

Occasionally you'll find cockroaches that slip into your inventory. If you go home without removing them they'll hunker down in your place. If you leave food out (cook it but don't eat it) it'll disappear the next day and the roaches will leave you a note showing their appreciation. After doing this enough, you'll find a new character to recruit standing in your bathroom.


Beggar

Welcomed Ernest into your home.

You can temporarily recruit Ernest on F1 if you have 1 or less total allies (i.e. in active party AND in apartment) If you have any more than that, then he won't join you! He's considered a "failsafe" in case you haven't recruited any others by now.

If you want to recruit Ernest permanently, then... he'll be kidnapped by Rats exactly 1 day after you've reached the Ground Floor. Return to his room on F1 to find Colonel Squeakums over a mangled dead body.

This is NOT Ernest, he's just been kidnapped, and Squeakums is being framed! Follow him to a hole in the wall in the F1 hallway. The gauntlet beyond this hole is known as Rat Hell.

If you successfully complete the Rat Hell gauntlet, then Ernest will permanently join you!

Note: If you have the {Rusty Crown} from killing the Rat King (and kneeling), you can hear what Squeakums these new rats are saying.


You can also check out this brief video that shows how to recruit Ernest, as well as the full optional Rat Hell Dungeon, as well as some alternative dialogue choices!


Little Menace

Welcomed Sophie into your home.

Will randomly show up at your door and ask to come in.

Note: Her mother Harriet also has a chance to randomly show up at your door. If you reunite them, you'll get some items in return! She can still join your party afterwards, but you'll have to pick her up from Apt 22 from now on.


Janitor

Welcomed Papineau into your home.

Papineau can be found in several locations. If you make it to the the Ground Floor (GF) with 1 or less allies recruited (i.e. in active party & in apartment), then he will easily be found in the Men's Bathroom standing in front of a sink. He'll be there as a backup/safety recruit, just in case you've gotten unlucky with getting new party members up until now.

Warning: if you find Papineau in the Ground Floor (GF) Men's Bathroom but you DON'T immediately recruit him after the bus crashes, then after a while the monsters will get to him, and he'll be dead on the ground.

The other (and most likely) way you'll encounter Papineau is behind the locked Ground Floor (GF) Janitor's Closet next to the stairwell door, the key for which is much further ahead. You'll need the {Janitor's Keyring} which is found in the Basement (B1) Parking Garage at the end, guarded by the Garbage Worm.


Troublemakers

Welcomed Xaria and Montgomery into your home.

Will randomly show up at your door and ask to come in. Will also kick you out of your room!

Note: BOTH of them must be in the party together; you can't bring just one or the other.
Achievements - Party Recruitment 2
Scavenger

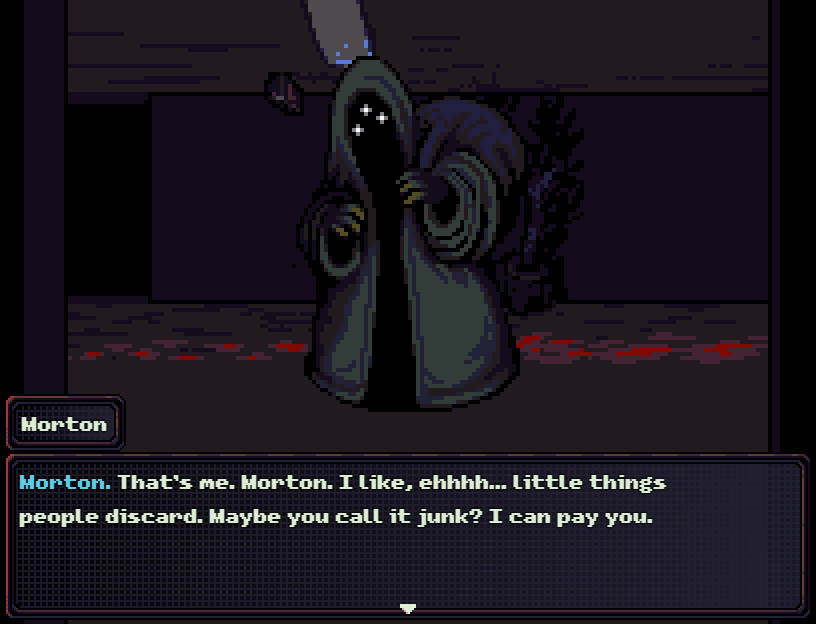
Welcomed Morton into your home.

Will randomly show up at your door and ask for any of your extra {Junk}. He joins once you've given him 15 or more pieces (Note: doesn't have to be all in one transaction!)


Moth

Welcomed Philippe into your home.

In the basement, south of the little friendly monster collective, there's a fungal infestation. You'll find a little moth guy trapped in fungal growth which you can save. Have him join your party right then and there to trigger the achievement. If you try to leave the area or don't hug the Spore Mother, he'll reveal he was a mushroom mimic all along and become hostile!

See the "Side Quests & Optional Content" section below for more details on Phillippe & the Fungus Lair!


Shadow

Welcomed Shadow into your home.

This one takes a total of 5 random encounters with the Shadow before it can be "recruited". Note: the Shadow is not an actual party member, but it still helps out and hangs out in your apartment. There will also be a disposition/trust system at play with the Shadow, so be sure to treat it as nicely as you can for the best results!

1st encounter: After some brief questions, you'll find out it is hungry, and get the option to give it some food. Give it something high quality (like food that mentions that it is "very filling") for the best result. The possible responses are "It seems like it enjoys the food a lot." (best), "It seems like it enjoys the food." (2nd best), and "Eating seems to have made it happy." (worst)

2nd encounter: Somewhere in the building on a new day, it'll give you a small scare, then you can ask it some questions before leaving. Avoid asking the negative questions!

3rd encounter: Somewhere in the building on a new day, it will give you a {Tongue} Key Item. Be sure to accept the gift, then you can give it a {Wrapped Gift} Item in turn (if you've found one) or simply say "Thank you"

4th encounter: Right in front of your apartment on a new day, it should give you a {Rose} Key Item if you've been nice enough to it. If you have NOT been nice enough to the Shadow, you'll still get either a {Kitchen Knife}, {1x Tonic}, {3x Tonic}, or {$350}, but you'll never see it again.

5th encounter: In your bedroom on a new day, it will approach you. Choose all the options to resist, then say "Never do this again." and "Can you behave?". Afterwards it will now "understand boundaries", then hang out in your living room and give you items regularly!

You can also check out this brief video that shows ALL encounters with the Shadow along with it's recruitment.


1$ a can

Welcomed Audrey into your home.

Audrey can be found just north of Ernest's Apartment on F1 (She's the Vending Machine, in case the image above didn't give it away) If she's not there, enter Ernest's Apartment and check the hallway again until she shows up.

After putting in $1 worth of coins, pick "Advice" and read what she's got to say!

Important Note: She only has only 8 Advice cans stocked, so be careful not to buy out her entire stock, otherwise she'll lose the ability to talk.

Explorer (Easy) Mode Stock: Cola (5), Lemon Soda (5), Orange Soda (5), Juice Box (6), Advice (8)
Survivor (Normal) Mode Stock: Cola (3), Lemon Soda (3), Orange Soda (3), Juice Box (4), Advice (8)
Cursed (Hard) Mode Stock: Cola (2), Lemon Soda (2), Orange Soda (2), Juice Box (3), Advice (8)

After buying 3-4 Advice cans, re-visit her until you catch her sleeping/dozed off. She'll freak out a bit, but do your best to calm her down and reassure her.

You should now get the option to "Examine the machine". On her front, you'll find a slot for a key, and on her back, you'll find a note pointing to "Mutt" downstairs.

Ask Mutt for the key, and he'll hand it over for free! On Cursed Mode: he will charge a base price of $150 for the key; and even more if you've been buying his special stock!

Go back to F1 and unlock the front door for Audrey. Ask her if "she needs a place to stay", and if you've been nice to her, she'll join! If she still doesn't trust you enough, buy all of her Juice Boxes for a major boost.

Also made a video for this one since it ended up being an ordeal getting the coins necessary (and a lot of missable dialogue)


Astronomy

Welcomed Aster into your home.

Talk to Aster in the 2F hallway, wandering in front of Lyle & Jeanne's Apartments. If you've officially met Aurelius (1F), Jasper (GF), and Beryl (B1) then...

Start a dialogue, ask "About joining you.", and he'll officially join your party!

Aster can be considered a safety net, in case you haven't gotten enough party members by the time you've reached B1, just like Ernest (1F Apt) and Papineau (GF Bathroom)

Also included is a handy video to guarantee recruiting Aster, since it ended up being a slight ordeal getting the right dialogue triggers (in v2.0, at least!)


Photography

Welcomed Lyle into your home.

On 2F Apt 21, find Lyle inside and ask to trade for some {Photo Paper}. Let him give you a kiss!

Now we need to burn something to the paper. In 3F Apt 31 on Day 3+, turn off the lights in the living room, then you'll find the {Void Disc} in the upper right-hand room. Point the telescope outside, then place the {Void Disc} on the ground to turn it into the {Negative Disc}.

Take the {Negative Disc} to 3F Apt 37 (your neighbor Victor) and go to the Golf Room to imprint the disc onto the paper. Afterwards, bring it to Lyle, then ask him to develop it.

Return the next day, get the {Photograph}, then let him give you a 2nd kiss! Do NOT peek! When next you return to your Apt, Lyle will have invited himself in, and wants to crash at your place (if you'll have him, of course)

This means that the earliest you can recruit Lyle is on Day 4! He is also another "guaranteed" party member, if you're willing to put in the early work.

Also made a video for this to combine the full recruitment steps and a full Mazes & Wizards campaign DMed by Lyle himself!

Achievements - Party Quests
Vermins Lair

Enter Rat Hell.

Entering Rat Hell is the way to rescue Ernest and recruit him permanently! After meeting him, he'll be kidnapped by Rats exactly 1 day after you've reached the Ground Floor. Return to his room on F1 to find Colonel Squeakums over a mangled dead body.

This is NOT Ernest, he's just been kidnapped and Squeakums is being framed! Follow him to a hole in the wall in the F1 hallway! The achievement should unlock after fighting the Rat Swarm.

Note: If you have the {Rusty Crown} from killing the Rat King (and kneeling), you can hear what Squeakums and the Rat Hell rats are saying.


You can also check out this brief video that shows how to recruit Ernest, as well as the full optional Rat Hell Dungeon, as well as some alternative dialogue choices!


Secret Garden

Do some gardening with a friend.

Recruit Hellen (see the "Party Recruitment" achievement "Maniac"), and keep your Bedroom Plant healthy! When you examine it, it should say "It looks great!" The best way to do this is to take care of it every day, and add {Potting Soil} from enemies in Apt 18 on F1.

After a while, she'll give you kudos for keeping your plant alive and well. She'll invite you to Apt 18 on F1. Follow her instructions TO THE LETTER in order to complete her Quest!

Important Note: You MUST water her plant for 4 days in a row. If you forget to water her plant, she will PERMANENTLY LEAVE YOUR PARTY and become an ENEMY who stalks YOU around the building! So don't forget!

Also included here is a video combining and detailing the full Recruitment & Quest steps for Hellen, Leigh, & Dan:


They grow up so fast...

The Rat child grew big and strong.

Save the Rat Child on the 1st Floor, by feeding the Mouth monster your arm instead and you'll be taking care of it safely within your apartment. You'll need to feed & care for it until it eventually becomes fully grown!


Wrong Number

Help someone get some closure on their old life.

Recruit Leigh (see the "Party Recruitment" achievement "Grinner" for more details), and progress until you reach the Ground Floor Mailroom. Pick up the {Cell Phone} from the ground in the bottom right corner and return home to charge it.

Once it's charged, read all the messages over several days to reveal that it was Leigh's Phone all along!

Speak with her in your apartment after reading the 4th and final message, then she'll invite you for closure at her Apt 23 on F2. Follow through to complete her Quest!

After you read the letter in her apartment, you will get the choice to say "You can be both Leigh and the Beast." OR "(Let her throw it.)"

Choosing "You can be both Leigh and the Beast." will grant you {Martin's Ring}, and equipping it on Leigh will give her complete control over her Beast form!

Choosing "(Let her throw it.)" will change her "Grinning Beast" skill to "Unleashed Beast". Her confusion lasts longer, but her Beast form lasts longer too. She basically becomes more dangerous to everyone (including yourself)

Also included here is a video combining and detailing the full Recruitment & Quest steps for Hellen, Leigh, & Dan:


He's real g*d d*mn it

In denial about Philippe.

Have Philippe join your party at the beginning of the mushroom infested area in the basement OR ask him to wait at the entrance. Either try to leave, or take him all the way to the end without inhaling any spores. Either way he fights you as a mushroom, say all the dialogue options that try to bring him "back". The responses are: "The fungus got into your brain...?" -> "Don't worry Phillippe. I'll save you!" -> "Don't worry Phil. I don't believe his lies." -> "You're my only friend Phillippe. I'll find a way."

See the "Side Quests & Optional Content" section below for more details on Phillippe & the Fungus Lair!


Friends Till The End

Nurse Philippe back to health.

Follow all the steps for the "He's real g*d d*mn it" achievement and retrieve {Philippe's Remains}. Bring it back to your Apartment, talk to him, cook him food and feed him, then over time he'll be back in fighting form!

See the "Side Quests & Optional Content" section below for more details on Phillippe & the Fungus Lair!


A Gamer's Burden

Retrieve Dan's NeoDuo.

Recruit Dan (see the "Party Recruitment" achievement for "Creep"), and progress until you have the {Basement Key} and he is at least Level 7. When you return home, he'll ask you to retrieve his {NeoDuo} from Apt 25 on F2.

You will need to progress far enough to reach the other side of F2, so you MUST have repaired the elevator first before you are able to fully complete Dan's Quest.

When you finally reach Dan's apartment, he'll open it for you. The rest is completely on rails, so just follow through and get Dan out unscathed. After you get back to your apartment, Dan will get a boost to all of his skills that boost his viewership!

Also included here is a video combining and detailing the full Recruitment & Quest steps for Hellen, Leigh, & Dan:

Achievements - Party Quests 2
Ad Hominem

Help solve some conflicts in your community.

After recruiting Roaches (see the "Vermin" achievement), you'll start getting events in your living room about an internal political divide between the roaches.

At one point, Roaches will be divided on that choice, and actually develop a new semi-permanent "Schism" form (by way of status effect) where their overall stats are almost halved... BUT they can now act twice in a row!

Help mediate between them for a few days until you are presented with a choice about the future of the roaches, those choices are:
  1. "King?" - Provides the {Papier Maché Crown} "Crown for the Roach King. Grants you the ability to make a royal decree." (Main Character Only)

    Using this Skill grants the "Royal Decree" status to all 3 other party members, who are forced to "Attack" 3 times in a single turn(!) with boosted stats! Be careful, as this will interrupt your other party member's actions.

  2. "Prime Minister?" - Provides the {Official Sash} "Official sash for the Roach Prime Minister. Grants you the ability to appoint a minister." (Main Character Only)

    Using this Skill grants the "Battle Governor" status to 1 other party member, who gains a massive boost in ALL of their stats!

  3. "The roaches must decide, not I." - Roaches will stay in their new divided "Schism" form, FOREVER!

  4. "I really don't want to pick." - A false choice, you must choose one of the above 3!


Is this your card?

Completed Juicebox's magic trick.

Spam Door Encounters until Xaria & Monty knock on your door. Recruit them, then on the next day, they'll also have invited Juicebox, who will also be in your room!

Speak with Juicebox for several days until you play a card trick game with him. To finish the trick head to the vending machine in the F3 hallway. You'll notice some telltale Juicebox stains everywhere... Buy some {Cheese-Stix} to get your card, the powerful {Four of Spades} accessory!

You can also check out this video about all things Juicebox!


Make Believe

Play Mazes and Wizards.

On F2 in Lyle's Apt, bring some {Herbicide} and open the upper right door to grab {Mazes & Wizards} from the right side of the room. Bring it to Lyle and ask about it! He'll protest, but say "we should play right now" to encourage him to the first session with your crew!

Additional Note: You will need a full 4 party members to play, with Lyle as the DM (5 total)

You can only play in the evenings, and it takes several hours for each one. You can squeeze 2 in a single day if you play at the start of an evening.

Additional Note 2: You can play either in Lyle's Apt OR in your Home Apt after recruiting Lyle.


Campaigns End

Complete a Mazes and Wizards campaign.

Follow the same steps for the "Make Believe" achievement above, but complete all sessions with Lyle to finish a full campaign!

Also made a video for this to combine the full recruitment steps + a full Mazes & Wizards campaign DMed by Lyle himself!

Achievements - Miscellaneous
One last game

Played with Benjamin

In one of the rooms, one of the kids, Ben will be on the floor. Talk with him and choose the following for the best result (Note: if your party has his brother Joel, he'll give you hints about what choices to make):
  1. "Sit down."
  2. "Show your Army Guy figure." (from Madison's room, get {Doorknob} from Joel first)
  3. "What are you playing?"
  4. "That looks fun!"
  5. "Can I play too?" (Note that he likes the helicopter the most)
  6. "Attack the tank." (Keeps the chopper safe)
  7. "Take the army guy."
  8. "(Villain Voice) You fell right into my trap!"
  9. "Your own army guy comes to the rescue!"

If you do it right, you should see "you're an excellent playmate" highlighted!

Choose to "Give him a hug.", then he'll give you several items in a row:
  • {Kill to Shoot} video game
  • {Teeth Pendant}
  • 5x {Hard Candy} & {Chocky Bar}

You can also check out this brief video that shows everything described above, as well as Joel's full set of comments about his brother Ben while you're playing with him.


Would you still love me if...

Led Nestor to Rafta.

There's a pipe in the Destroyed Apt on 1F (after Lyle's Apt) with someone named Rafta in it. Talk to her and get her a {Fountain Pen} from the Rat Child Apt on 1F, and {Stationary} from the Mailroom Office on the Ground Floor.

She'll write a letter that you can deliver to Nestor in the Ground Floor bathroom. Tell him "Give her a chance!" and "Absolutely!" and he'll go find her. Head back to 1F for the pipe with Rafta and check on the both of them!

You can also check out this brief video that shows the full outcome of the Rafta & Nestor side quest here (along with the locations of Rafta, Nestor, and the required items!)


Unhinged Crossword Maniac

Completed the crossword book.

Play the crossword puzzle (retrieved elsewhere in the building, shows up next to bookshelf in your Apartment's Living Room) for as many hours as you can until they are fully completed! For me getting through the 4 levels of puzzles (ending with expert) took a whopping 71 hours and 73 puzzles to complete.

Bonus Puzzle Progress 1: If you have recruited Morton, then he'll help you with the puzzles as you go, decreasing the amount of time it takes.

Bonus Puzzle Progress 2: If you have completed the {Crossword Challenge} video game, then it will also additionally decrease the time it takes, due to your expertise!

When you finish, you'll get a code: "What's this? There are numbers scrawled on the margins of the book's final puzzle. 22817..." This code is randomly generated for everyone, and is different on every playthrough.

The use for this reward is a safe that you can find inside the door that requires the {Pluto Disc} to unlock within the Basement Storage room (the one with Steve)

If you want to cheese the results you'll note that the code is currently generated at the beginning of a New Game... So you can do all the Crossword Puzzles, jot down the code, then reload an earlier save and the code will still work! (Note: this may get fixed in the future, but it works as of the first week of v2.0)


Living Dangerously

Stayed away from home for more than 8 hours.

This one's pretty simple; just spend more than 8 hours outside of your apartment in one go. Visiting new locations and getting into fights will do it!


A Chat with a Rat

Spoke to a rat.

Wear the {Rusty Crown} from kneeling to AND defeating the Rat King in the 1F hallways, then speak with ANY rat (mostly on 1F) Try not to kill any before then!


Hat Trick

Was tricked by a hat.

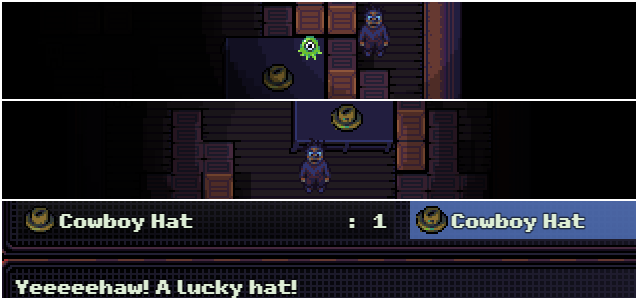
In the leftmost part of Frederic's Apartment there will be a suspicious looking {Cowboy Hat} sitting on a table. Pick it up and put it on; you won't be able to remove it!

Speak to Toxic Fred in the next room, where he'll threaten you into killing the other Freds. The achievement should trigger as he gives you a {Stained Key}.

Fun facts: the actual {Cowboy Hat} description is "Yeehaw." The fake {Cowboy Hat} description is "Yeeeeehaw! A lucky hat!", then it turns to "Yeeeeehaw! A lucky hat?" after you realize it can't be removed!

If you attack Toxic Fred immediately, Sam will be KO'd and your party members will have to save you, otherwise, it's an instant game over!


See the "Side Quests & Optional Content" section below for more details on all the Frederics!


Just some guy

Got angelic Fred to drop the act.

In Frederic's Apartment on 1F, find Godhead Fred (a.k.a. Angelic Frederic) in the back. Talk to him, refuse his quest, then say "You're just a painting." and he'll drop the act!

See the "Side Quests & Optional Content" section below for more details on all the Frederics!


Smeck

Kissed Lyle.

Talk to Lyle (Apt 21 on 2F) about trading and then let him smooch ya for some {Photo Paper}. Pretty easy!


How could you

Peeked at Lyle's true form.

To get this achievement, you MUST have let Lyle kiss you for the initial {Photo Paper}, if you don't, then you're locked out of this one for the playthrough! Come back with the {Exposed Paper} later, and have Lyle develop it. Come back the next day to pick it up, then he'll ask for "another kiss". That's your cue! Go ahead and take a peek at your first opportunity.

Afterwards, Lyle will be embarrassed and lock himself in the darkroom! Here's a possible rendition of what's behind the door after peeking: https://steamcommunity.yuanyoumao.com/sharedfiles/filedetails/?id=3456390677
If you're also trying to get the Photography Enthusiast achievement (e.g. "Defeated Shutterbug") then you'll be locked out of that one, as well as any other Dark Room achievements. Plan ahead!
Achievements - Miscellaneous 2
Crunch

Fed the wall.

On the 1st floor after saving the Rat Child, there's a room nearby that has a mouth monster that won't let you go unless you feed it a child. You can accept and feed it the Rat Child to get this achievement, or you can refuse, and propose that you feed it your arm instead to get the Selfless achievement instead.


Selfless

Saved the rat child.

There is a mouth monster on the 1F labyrinth in Apt #13. If you saved the Rat Child from another room on 1F then it won't let you leave unless you "feed it a child". Refuse, try to leave through the infinite hallway, then return. It should now say "no escape". You'll get a new option to feed it one of your arms instead to save the Rat Child!

Gameplay Consequences: You'll lose access to Melee or Ranged, and "most" Two-Handed weapons. Though if your Left Arm is Gnawed Off, you can still "equip" the {Crossbow}!
Related Easter Egg: Speaking of missing appendages, if you named your main character "Ash", "Williams", or "EvilDead" (case sensitivity doesn't matter), then you can still "equip" the {Chainsaw} and the various {Shotgun} weapons!


Bestowal

Exchanged Massacre princess for the katana

If you buy the {Massacre Princess} video game for $120 from the Gamer who randomly shows up at your door, he'll say it was an accident and he'll pay you $200 for it back. Refuse, and he'll up the ante by offering you a {Katana} in exchange! Accept, and the weapon is yours!

If you're trying to get other achievements that require a copy of {Massacre Princess}, then you'll have to get it in another run (unless you've made a decent number of saves to fall back on, of course)


Power of Friendship

Completed Massacre Princess

Buy {Massacre Princess} from the Gamer. He's a random fellow who knocks on your door and offers to sell to you. Refuse to give it back for $200 OR the {Katana}, then set aside a LOT of time in front of your TV to play it through to completion!

It takes a whopping 12 gaming sessions to complete it, and teaches you the {Meteor Strike} skill for finishing it.


Model Tenant

Fully Paid your rent

Keep progressing through the Landlord's Apt on the Ground Floor and keep paying him to proceed.


Heartbroken

Was rejected by your plant

Make sure to keep talking to your plant every day (and watering it) until it breaks your heart </3

You'll be asked if you want to bring the plant into the light after a few days. Just leave it where it is, and just water it and talk to it exactly once per day for the easiest trigger. Bringing the plant into the light is currently a detour with no resolution, so avoid it!


Ultimate Gamer

Beat at least 10 different games in one playthrough.

In your apartment, you'll start with 3 video game cartridges, and eventually accumulate up to 20 total over the course of the game. Play each one through multiple sessions until you learn a skill from it. Keep doing this until you've learned at least 10 skills to trigger this achievement!

See the section below titled "Complete Video Game List & Skills List" for how to find each!


One million little enemies

At war with the roaches.

Bring roaches back to your apartment without removing them from your inventory, and antagonize them as much as you possibly can by squishing them (and eating them, if you're so inclined) until you get a letter from them saying "IT WAR!! YOU BAD!"

You can potentially do this in a single day, as you can move between your living room, bedroom, and bathroom and squish as many as possible (seemed near unlimited amounts after bringing home 5-6 roaches throughout the building). Go to sleep for the night, and there should be a roach with a letter in it's mouth in the living room waiting for you.


One million little friends

Made peace with the roaches

Bring roaches back to your apartment without removing them from your inventory, then be nice to them until they start giving you notes!


With your sweat and tears

Bought the trophy from Mutt's shop.

Shows up in Mutt's Shop on the Ground Floor (GF) after 14 days have passed (e.g. when the calendar says "Only 1 days left...") The baseline cost for it is [$200].

Be careful if you've been buying special goods from him all game, as everything increases in price significantly with compound interest (ended up costing more than [$900] on my first playthrough) Simply buy it and the achievement is yours!

If you can't afford it: you can kill Mutt after fixing the elevator and approaching his shop from the rear instead. Afterwards, you can take all of his special items without paying for them!


Frederic

Helped Frederic get rid of his portraits.

Help the first Frederic you encounter, which is actually Fake Frederic, since he stole the face of the Real Frederic in the back. You won't be able to trigger the achievement by helping any of the other Frederics, including the real one.

Fortunately, completing Fake Frederic's quest to kill all other Frederics provides a {Paint Palette}: "A mysterious paint palette, held in place of a ranged weapon. Adds random status effects to melee."


See the "Side Quests & Optional Content" section below for more details on all the Frederics!


Coulrophobia

A heart-to-heart with Pierre.

On Day 4, you'll see someone named Louis walking to the apartment at the end of the hall on the left. Follow him inside, and walk into the door on the right side of the living room to enter Pierre's room.

Speak with (and get creeped out by) Pierre, then go about your regular day. You can't re-enter his room afterwards.

When sleeping the next night, your MC will have a nightmare about Pierre. Now, your Door Encounters will have a chance to have Pierre show up!

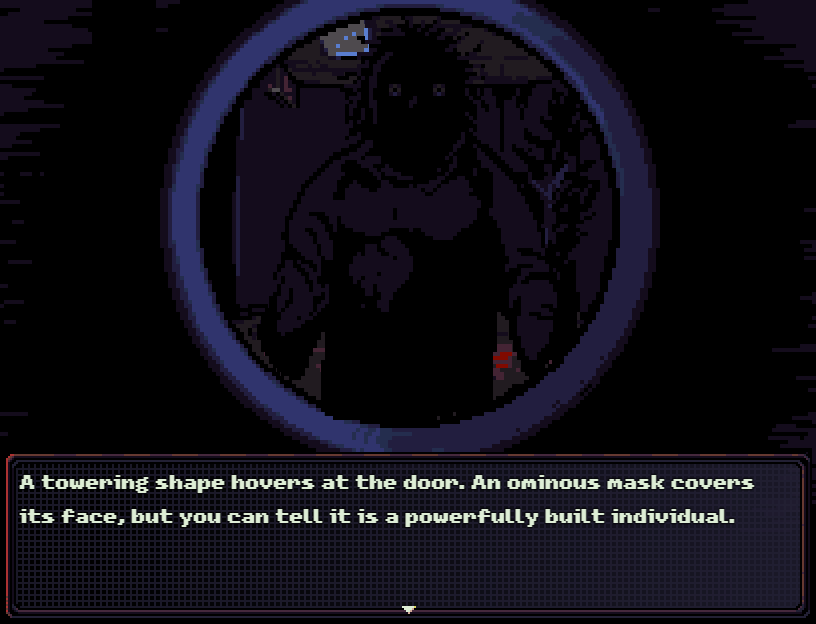
If you do encounter Pierre knocking on your door, be sure to talk to him! Do NOT leave the eyehole, or he'll be gone forever!
Achievements - Miscellaneous 3
Suit of Shame

Killed Eugene and robbed his home.

In Eugene's Shop on F2, you must kill Eugene, grab the key from his corpse, and fully loot his Apartment for this achievement!

Alternative Kill Method: If you let post-worm Nestor "assimilate" Eugene, then you must kill Nestor immediately, otherwise he'll lock the Shop when you leave for "re-decorating".

The day afterwards, he will cover Eugene's bedroom bookshelf (the secret backroom entrance) with Worm Eggs, making it completely inaccessible.


In The Dark

The power went out.

Sometime after fixing the elevator at the end of B1, the power will go out! This achievement will trigger once that happens.


Power Surge

End the blackout.

Once the power has gone out, near the B1 elevator, there is now a door leading to some electrified rooms and enemies. Be careful with the electrified floors, as they can damage and kill your party!

Progress to the end, defeat Electrophage, and restore the power to get this achievement.


Shoplifting

Killed Mutt.

When approaching Mutt's Shop from the rear, accessible after fixing the elevator, you can run into him behind the scenes!

You can choose to kill him, trigger this achievement, and steal all of his special items, but he'll no longer restock either his normal items or his special items. Everyone in the shop will also be gone except for Emmanuel.


Godmutt (aka TestAch_Misc17)

Kill Mutt after he's powered up.

Same as the above "Shoplifting" Achievement, but wait until after Day 10 when Mutt has brought out a large portion of his special stock/items for sale.

He will have additional moves depending on which items are out for sale (not fully working yet, but it will in the near future, so do it now while it's easier!)


Sewer Kids

Find the children in the sewers.

The Sewer Kids can be found shortly after entering the flooded part of B1. You'll find out more information about them from David (their teacher) who's concerned about his kids having gone missing.

If you ask about the kids, you'll get their names, and a short description of their personalities:
  • Oliver is non-verbal, but opens up if you talk about his drawings
  • Victor & Florence are glued to their game system
  • Coralie & Thomas are always bickering, and Coralie is wearing a Cosmonaut outfit.
  • Zachary will be with his seeing-eye dog Roxie
  • Alice has a little crown and fairy wand
  • Tristan is a little trickster

To complete this Side Quest, find all the kids and convince them to return to David! You'll have to navigate the labyrinthian area, and guess all of their names from the clues given.

Answers:
The Scary Thing is Oliver
The Eyeball Thing & Gaming Kid are Victor & Florence
The Cosmonaut & Eyestalks are Coralie & Thomas
The Centipede & Weird Bug (separated) are Zachary & Roxie
The Fly Kid is Alice
The Tentacle Thing & Charlie are Tristan & his pet Charlie


If you're having trouble finding any of the Sewer Kids, you can also use this video as a guide to help you locate each one!


Big Friend

Have a chat with Charan.

Jump into the hole on the south side of the B1 Parking Garage, past the hallway just to the left of Stuart, in order to find and meet Charan!

Important Note: The path to the hole will be BLOCKED on Day 8 (you'll know when it's too late as an "earthquake" will occur and shake your screen) so you must be quick!

The gift he is looking for is the {Rose} you can get from being extremely friendly with the Shadow, which adds another time pressure to this event. If you want to do both, make sure you talk to the Shadow every single day, and make it to the B1 Parking Garage before Charan leaves. The reward is the {Azure Greatsword}, and on the next day, you can now jump down the hole and explore the area where Charan was previously residing.


Astrolabe

Solve the planetarium.

Follow all the steps for the "Where it all began" Progress Achievement to reach F1 Apt 12.

In the main living room, look where the meat on the ground is gravitating towards on the west wall. You will find a hidden door there that you can reveal with {Herbicide}.

Behind that door there will be a hallway with a keypad. You can find the code from Sybil's notes in the kitchen. Presuming it is not random on every playthrough, the code will be 187552.

Inside the Planetarium, you'll need to insert planetary Discs in this order, starting at the center: Sun, Mercury, Venus, Earth, Mars, Jupiter, Saturn, Uranus, & Neptune.


Face to face

Speak with Sybil face to face.

Follow all the steps for the "Where it all began" Progress Achievement to reach F1 Apt 12.

In the main living room, look where the meat on the ground is gravitating towards on the west wall. You will find a hidden door there that you can reveal with {Herbicide}.

Fully explore the area behind the hidden door to find a large room with pillars. You'll find the {Apt 35 Keys} in that room. Take it back to F3 and open Sybil's Apt next to yours.


Meat World

Exploring the other place.

There are various ways to enter this area, but the most likely you'll encounter is defeating Darryl in the bottom right of B1 Parking Garage after the power outage. Grab the {Iris Key} in the hole next to where Darryl came from, then use it to unlock the door behind the Hellcar up north in that same Parking Garage.


Wormy Deal

Make a deal with Kevin.

Follow all the steps for the Nestor & Rafta Quest until Nestor meets up with Rafta. Afterwards, leave Nestor's Body alone for a few days, do NOT attack it.

Kevin will eventually show up in Rafta's Apt (i.e. where Nestor's Body is)

Talk to Kevin; you can trade him those {Worm Egg} drops you've been collecting around the building, and he'll also suggest a way to deal up humanity if you say "You seem friendly."

Make sure you actually make a deal with him! You can fail getting this achievement if you say any form of "no deal".
Achievements - Bosses
Grin

Defeated the Grinning Beast

On F2 at the end of the hall, you'll pick up the {Apartment 21 Key} then get chased by the massive Grinning Beast when you walk back down the hall towards the stairs.

You'll need to win the fight against the Grinning Beast instead of running away!

Afterwards, make sure that you head left (the direction it came from) to find the open door where the Grinning Beast had broken out. Inside you'll find Leigh, who can be recruited as a new Party Member!


Teething

Defeated Baby Teeth

On Day 2, Apt 32 (also on F3) just across from yours will now be open. Defeat Clint in the hallway, then get the {Doorknob} from Joel in the bathroom.

Continue traversing the house, defeat Madison, and loot the kitchen (specifically the fridge) On the way back (in the same room as Madison) you'll be ambushed by Baby Teeth from the shadows! Intentionally get into a fight, then defeat her!


Photography Enthusiast

Defeated Shutterbug

Lyle (2F Apt 21) turns into this if you attack him! Make sure to attack the photo and destroy it quickly leaving Lyle/Shutterbug as your only enemy. Use Molotovs to attack his weakness. Delay for a bit until his true form is revealed.


Identity Crisis

Defeated Painter

Frederic in the first room is actually Fake Frederic (a.k.a. Face Taker), as he stole real Fred's face. Real Frederic (AKA Faceless Frederic) can be found in the very back locked behind a door that needs the {Stained Key}, which you'll have to get from Toxic Fred. Defeat Face Taker for the achievement.

See the "Side Quests & Optional Content" section below for more details on all the Frederics!


The stars gazed back

Defeated Stargazer

Found on 3F Apt 31 on Day 3+. Turning off the lights will reveal it!


Writers' Block

Defeated Typewrither

Found on the other side of 2F Apt 27, accessible only after fixing the elevator.


Surveillance

Defeated Panopticon

Found in the Security Room in the Basement. Disc combo to get in: Neptune (16) & Mars (2) Discs, then the Sun (13) & Pluto (5) Discs. For the extra door, use Uranus (28) & Negative (-10) Discs.


Iron Crown

Defeated the Rat King

Can be found wandering the 1F Labyrinth. At the start of the fight, you'll get the option to "kneel". If you accept, you'll take some major status damage, but you'll receive the {Rusty Crown} for winning. If you refuse, then after the fight, the {Rusty Crown} will disintegrate permanently.


Got out of hand quickly

Defeated Crawling Hand

You can find the Crawling Hand on the Ground Floor after the bus crashes into the Main Lobby.


The Crawler

Defeated Crawler

Found in the B1 stairwell a while AFTER the bus crashes into the Main Lobby.


Polyglot

Defeated Argot

Argot can be found in the B1 Storage Room (south after the 1st hallway) behind the locked door requiring the Neptune Disc [16].


Absolute Zero

Defeated Pompom

In the frozen apartment across from yours on 3F. If you run out of Ice Melt Salt, there are more elsewhere in the building outside of that apartment, or it can be crafted.


Foxhole

Defeated the Grave Digger

Progress through the Landlord's Apartment, then shortly after your last rent payment, you'll run into this boss, your former landlord, now fully mutated into the Grave Digger.


Waterlogged

Defeated Boiler Beast

Found in the B1 Flooded Area after hitting the lever that lowers the metal bars.


Mycelihumor

Defeated Laughing Mold

In the B1 Fungus Lair. Find the step stool (raises and lowers others) that traps you on the right side of that room, then wait for it to rise up and start moving! You can talk to it, be nice, and you won't have to fight and still get the achievement.

See the "Side Quests & Optional Content" section below for more details on Laughing Mold & the Fungus Lair!


Mushroom Queen

Defeated the Spore Mother

Found at the end of the B1 Fungus Lair. Defeating her will remove all the spores and enemies in the area.

See the "Side Quests & Optional Content" section below for more details on the Spore Mother & the Fungus Lair!


Traffic Stop

Defeated the Police Car

Found halfway through the B1 Parking Garage.


In the Salad Basket

Defeated SWAT Truck

Found at the end of the B1 Parking Garage.


Highway to hell

Defeated the Hell Car

Found at the north side of the B1 Parking Garage next to a Flamethrower. If you fail to defeat it in time, then you'll be taken to Car Hell! (another achievement) Behind it is the Hellsword: one of the strongest melee weapons in the game!


Garbage Disposal

Defeated Garbage Worm

After fixing the elevator, go up to the Ground Floor, then head north to fight the Garbage Worm. Defeating it awards this achievement and the {Janitor's Keyring}.
Achievements - Bosses 2
Burned Out

Defeated Furnace

In the B1 Flooded Area, you'll notice ticks feeding on various Furnace Arms. In order to fight the Furnace, you'll have to remove every single tick on each of those arms throughout the area, then investigating the Furnace in the middle of the zone.

The majority of the ticks are hostile, and can be easily dealt with by killing them. There's only one exception: Tickle the friendly tick! You can find him just north of the Furnace. You can even trade your party's blood (their HP, basically) with him for items!

When you're done trading with Tickle, you can either attack and kill him, OR suggest "feed on me instead" to remove him from the Furnace Arm, so that you can fight the Furnace.

If let him feed on you, this will lower your stats (-30% Max HP, -30% Max STM, -20% ATK) but also provide you with unique and supportive Tickle Skills, turning the MC into a pseudo-"Blood Cleric" class!

Note: If you ever get tired of lugging Tickle around, then try speaking with someone named Henri in the room just before the Parking Garage...

When you find Henri, he'll tell you he's letting all of those ticks feed on him. You can let Tickle feed on Henri instead and they'll both collapse almost immediately.

If you're having trouble finding out what to do with Tickle, you can also use this video as a guide to help you find both him and Henri! (Skip to 18:07)


Once all the ticks are gone, you can find the Furnace in the middle of Flooded Basement. Interact with it to start the fight! Defeating the Furnace will award you with this achievement, bragging rights, and the powerful Furnace Blade melee weapon.


Chimera

Defeat the Rat Chimera

At the end of the Rat Hell dungeon, you'll be faced with a choice to fight either the Rat Chimera or the Rat Champion. Choose the Rat Chimera on the left and defeat it for this achievement!


Duel

Defeat the Rat Champion

At the end of the Rat Hell dungeon, you'll be faced with a choice to fight either the Rat Chimera or the Rat Champion. Choose the Rat Champion on the right and defeat it for this achievement! Note: this is a SOLO fight, so bring someone extremely powerful on their own.


Formaldehyde

Defeat Suture Wire

At the end of the F3 Taxidermy Apt, after completely looting the "other" zone, you'll be attacked by the boss (that's been following you around) in the living room before leaving. Defeat it for this achievement!


Sewer Beast

Defeat the Sewer Beast

In the B1 Flooded Area, in the very bottom right of the zone will be Roxie, the missing (and mutated) dog. After meeting them, your way out will be blocked by a giant Sewer Beast! Defeat it for this achievement!


Personel Carrier

Defeat the APC

In the mutated Landlord's Apt on the Ground Floor, eventually you'll run into an "outdoor zone" that repeats infinitely. The APC will be patrolling that area; defeat it for this achievement!


Join Them

Defeat the Olm

After the power has gone out, you'll have no choice but to take the stairs to get to B1. You'll notice the corpse at the bottom of the stairs has now moved... Chase it to the B1 Parking Garage, and encounter the Olm. Defeat it for this achievement!


Hide and Seek

Defeat Darryl

In the very bottom right of the B1 Parking Garage will be a hole with Darryl hiding out. You'll see an item that you can't grab (yet)

He won't come out because it's too bright, but if you wait until the power outage, then you can fight and defeat him for this achievement and an {Iris Key}!


Vanguard

Defeat Shrimp Knight

In the F2 Flooded Apt (after fixing the elevator), just before Summer's Room (aka Lethargy) will be a Shrimp Knight guarding the door. Defeat it for this achievement!


Megalodon

Defeat Shark Abomination

Found in the middle of the F2 Flooded Apt (after fixing the elevator), before finding the final Valve needed to progress. Defeat it for this achievement!


Stagnation

Defeat Lethargy

Found at the very end of the F2 Flooded Apt (after fixing the elevator) Make sure you have plenty of time left to breathe, then defeat her quickly for this achievement!


Obsession

Defeat Obsession

Follow all the steps for the "Where it all began" Progress Achievement to reach F1 Apt 12.

In the main living room, look where the meat on the ground is gravitating towards on the west wall. You will find a hidden door there that you can reveal with {Herbicide}.

Fully explore the area behind the hidden door to find a large room with pillars. Shortly after grabbing the {Apt 35 Keys}, in that room you'll encounter Obsession. Defeat it for this achievement!


Word Salad

Defeat Wilhelmina

Completely finish the {Crossword Puzzles} book from Lyle's Apt, and get the 5-digit randomly generated code at the end.

Go into the room behind the door that is locked by the {Pluto Disc} in B1 Storage (i.e. Steve's room) Use the code you received on the safe.

Inside, you'll find the depths of the legendary Crossword Dungeon! If you have Morton, be sure to bring him for a leg up with some puzzles, and a lot of bonus dialogue.

At the end of the dungeon when you begin speaking with Wilhelmina, do NOT choose the option to speak the "Words of Power".


The rewards for defeating her are a choice between the {Spellsword}, the {Spear of the Word}, or the {Wordsmith's Hammer}. Equipping any of them grants powerful Skills, bolstered by the user's vocabulary! (i.e. boosted for Sam or Morton, most likely)
Achievements - Bosses 3
Electroshocks

Defeat Shockipede

After the blackout, you can find Shockipede just north of the B1 Electrical Room, on the west side of B1 past the Parking Garage, near where you first encountered the Garbage Worm.


Syncope

Defeated all of Nestors' transformed parts.

After completing the "Would you still love me if..." Achievement and uniting Rafta & Nestor, you'll have to locate every single one of Nestor's body parts to complete this one.

- Nestor's Head will go upstairs and try to take over Eugene's Shop, unless you kill it before it gets there.

- Nestor's Body stays in Rafta's Apartment, but you may want to leave it alone for a while until Kevin shows up a few days later (trades for your {Worm Egg} items)

- Nestor's Hand will make a nest in a room on F1. You can find it in the long hallway with multiple locked doors in a row. The correct door is the 3rd one from the left on the south side of the hallway.

- Nestor's Foot will take over Marshall's Stall on the Ground Floor Men's Bathroom.

Important Note: I recommend making a hard save before taking out any of Nestor's Body Parts, in case there's a bug or issue with the achievement unlocking, so you can easily try again.


Crimson Scourge

Defeat the Crimson Scourge

Provide a Cursed Offering to Jasper then defeat his powered up mutated form on the roof.

Give Jasper the {Last Will}, which is found in the "Glitch World" you can enter by playing the {Unlabeled Cartridge} in your corrupted living room (aka Spine's room)

Important Note: I highly recommend following the steps for the Ending Achievement "Look Inside" to accomplish this one and several others all in one attempt!


Dream Eater

Defeat the Dream Eater

Provide a Cursed Offering to Aster then defeat his powered up mutated form on the roof.

Give Aster the {Old Photograph} found in the Landlord's Apt. There's a hidden wall at the very top of the {Wraithscourge} room that can be blown up with a {Sapper Charge}.

Important Note: I highly recommend following the steps for the Ending Achievement "Look Inside" to accomplish this one and several others all in one attempt!


Hundred Maws

Defeat Hundred Maws

Provide a Cursed Offering to Beryl then defeat her powered up mutated form on the roof.

Give Beryl the {Old Tape} found in the F4 "Metro". You must play the "Elevator Game" to get there.

The hint for how to play the "Elevator Game" can be found written inside Marshall's stall in the GF Men's Bathroom after Rafta & Nestor are united.

The "code" for the elevator is 0-3-1-2; which means use the elevator to go to to the Ground Floor, then F3, F1, and finally F2 to have F4 show up as a new permanent option.

Important Note: I highly recommend following the steps for the Ending Achievement "Look Inside" to accomplish this one and several others all in one attempt!


Spine Taker

Defeat Spine Taker

Provide a Cursed Offering to Aurelius then defeat his powered up mutated form on the roof.

Give Aurelius the {Wrapped Painting} found in the B1 Pit. Find Charan south of the Parking Garage before Day 8. Hand over the {Rose} from Shadow and he'll leave the next day. Jump down the hole.

Important Note: I highly recommend following the steps for the Ending Achievement "Look Inside" to accomplish this one and several others all in one attempt!


Oracle's End

Defeat Sybil

Speak with all 4 Astronomers until you find out that Sybil was a fellow Astronomer, and was the first one that actually saw the Visitor. Once you have this information, confront Jasper about Sybil and he'll hand over {Jasper's Key}.

Take the key over to F1 Apt 12 right across from the Mouth Monster's Apt 13. In the back of that room, barely visible, will be a place behind the growth that you can use the key.

In the main living room of Apt 12, look where the growth on the ground is gravitating towards on the west wall. You will find a hidden door there that you can reveal with {Herbicide}.

The hallway behind the hidden door there will be a hallway with a keypad. You can find the code from Sybil's Notes in the kitchen. The code will be 187552.

Inside the Planetarium, you'll need to insert planetary Discs in this order, starting at the center: Sun, Mercury, Venus, Earth, Mars, Jupiter, Saturn, Uranus, & Neptune.

In the southern room that opens, pick up the {Telescope Pieces}. Also retrieve the {Apt 35 Key} in the Planetarium's large pillar room. Take the telescope pieces to Jasper to repair them. Give the {Telescope} to Sybil in her Apt 35 on F3.

You'll now get the option to Attack Sybil. Do it, and win the fight! You can weaken her by killing organ monsters throughout Meat World.


Whisperblade

Defeat Swordmaster Comatus

Found through a hidden path on the east side of the Spore Mother's room in the B1 Fungus Lair. Walk through the wall and follow the path until you find Swordmaster Comatus.

Ask about their backstory if you desire, then challenge them to a duel and win for the powerful {Whisperblade}!

If you visit the Swordmaster the next day (and you had asked them about Yoga) near the other friendly B1 denizens, then you can learn {Tadasana} PERMANENTLY!

You can also see the path to the Swordmaster, as well as a full completed fight, along with the rewards chronicled in the video below.

Check it out!
Achievements - Unique Deaths
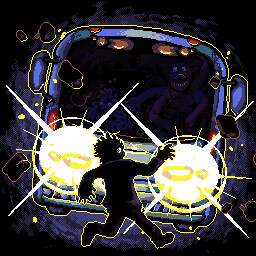
Look Outside

Followed Instructions.

Simply start up the game and look out the window!


Behind the Mask

Embraced the shadow.

After being friendly with the Shadow, it'll eventually show up in your room and try to invite you into it's coat; don't try to resist!

You can also check out this brief video that shows ALL encounters with the Shadow along with this unique death.


Worm debate

Was killed by Nestor

After Rafta & Nestor meet up assuming you followed Nestor's head up to the 2nd floor shop, you'll now be talking to Nestor instead of Eugene. Ask him the following: -> "What did you do to Eugene?" -> "Is he dead?" -> "Let him go." -> "You are torturing him!" then commence the consequences!

Note: Attempting to fight Nestor and failing to defeat him in enough turns will also result in this death.


You can also check out this brief video that shows the full outcome of the Rafta & Nestor side quest here (along with the locations of Rafta, Nestor, and the required items!)


It DID last longer.

Become trapped in a photograph.

If Lyle (Apt 21 on 2F) is attacked, they'll start to develop a photo of you in the corner (it can be defeated). Let the fight progress far enough without destroying the photo to reap the consequences!


Through the looking glass

Killed by a telescope.

Look through the telescope in Apt 31 on 3F after pointing it outside. You can also die by looking at the projection on the ground after turning off the lights.


Projector Doom

Projected the negative on the wall

In Apt 37 on 3F (Victor's Apartment), look for the Golf Room's projector. Get the {Void Disc} turned into the {Negative Disc} from Apt 31 on F3, then bring it here.

Project the {Negative Disc} image directly onto the wall instead of tilting the head down to avoid seeing it. Whoops!


Dark Room

Looked at the photograph

In Apt 21 on 2F (Lyle's Apartment) you'll get the {Dark Room Key} after defeating Lyle.

To get some {Exposed Paper} of the image that will kill you, use the {Void Disc} turned into the {Negative Disc} from Apt 31 on F3, then bring it to Apt 37 on F3 (Victor's Apartment) in the Golf Room with the projector.

Do the following: "Tilt the head down." -> "Place photo paper" -> "Insert disc." -> Use {Negative Disc} -> "Switch it on." -> Get {Exposed Paper}.

Bring the {Exposed Paper} back to Lyle's Dark Room and use the basins to develop the photo. Keep trying to look at the photo as it develops!


Oculus

Stared at the big eye for too long.

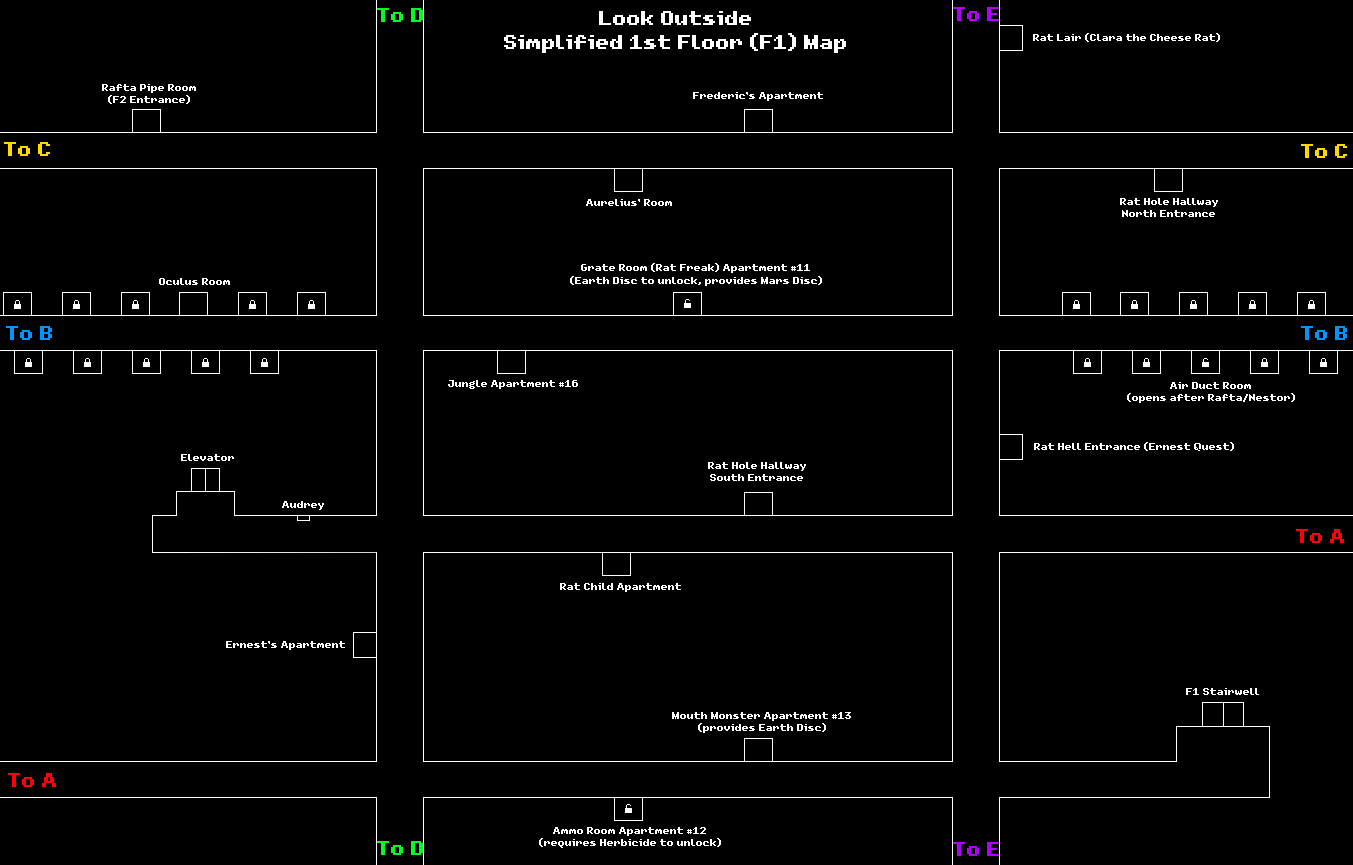
Stare at the big eyeball in one of the doors on 1F (the one hallway with too many doors) for way too long. Check the maps section below to see exactly where it is.


Vehicular Manslaughter

Got run over by the bus.

The first time you go into the Main Lobby on the Ground Floor, a bus will crash into the building. Quickly run over to the front of it and get hit!

Alternative Late Game Option: after playing the "Elevator Game" and reaching the F4 Metro; the trains will occasionally pass through AND you can get hit by them! Doing so will also provide this achievement.


One With The Fungus

Embraced the spore queen.

Reach the end of the B1 Fungus Lair with Phillippe in your party. When he goads you into embracing the Spore Queen (regardless if you've accidentally touched any spores) go ahead and do it!

See the "Side Quests & Optional Content" section below for more details on the Spore Queen & the Fungus Lair!


Car Hell

Was brought to hell (by car).

On the north side of the parking garage in the basement, right next to a {Flamethrower} on a bench, you'll encounter the Hellcar! Get into a fight, then after it swallows you whole, fail to escape in time.


All you need is love

Tried hugging the Fred who bites.

Basically, talk to Fred Who Bites until you get options to try to calm him down, then offer to give him a hug. Keep trying way, way too hard to give him a hug, and don't give up! (until you die, of course)

See the "Side Quests & Optional Content" section below for more details on all the Frederics!


Successor

A worthy successor.

Get into a fight with the Rat King wandering the halls maze-like halls of F1.

On turn 2 of the fight, you'll get the option to kneel which, if you do, will cause the Rat King to deal damage to your whole party AND inflict various status effects! Choosing that option basically makes the whole battle harder, but you will get the {Rusty Crown} as a bonus for winning.

For this achievement, you want to both kneel AND get killed by the Rat King. You'll then trigger a short description of your untimely demise.


Drowning

Run out of air.

In the F2 Flooded Apt (after fixing the elevator) intentionally run out of time, then lose the fight to the "Drowning" monster to trigger this achievement.


Obliterated

Get utterly annihilated.

All 4 Astronomers will all have a dialogue choice with the word "kill" in it, along the lines of "Why not kill it?" or "...I think I could kill it." Speak with all of them and make sure to choose that dialogue option for EACH of them, 4 in total.

Perform a Perfect Ritual, and defeat the Exalted Four. When you first get the chance to speak to The Visitor after he takes you apart and puts you back together again, choose the new hidden option now revealed: "(Attack!)"

Attack it until you are subsequently obliterated by The Visitor for 1 gazillion damage (probably more like 1 million, but it doesn't matter at this point)


Massacred

The party was defeated...

Follow the same steps for the "True Final Ending" achievement, except fail to win the fight as the Massacre Princess crew.
Achievements - Endings
Truth

Looked upon the visitor's true form.

Give 4 correct offerings of the Visitor to all 4 Astronomers, then speak with Jasper on the ground floor, to get a key for the roof.

The correct offerings are:

A Painting of the Visitor, which you can give to Aurelius. It can be found in Frederic's Apartment on 1F. Get a {Canvas Bag} from Fake Frederic, then touch all the paintings in Fred's backroom until you find and retrieve the painting that is BLUE and WET.

A Photograph of the Visitor, which you can give to Aster. Starts with the {Void Disc} and Telescope on 3F. Turn it into the {Negative Disc}, then place {Photo Paper} in front of the Projector in the Golf Room in Victor's Apartment on 3F. Take the {Exposed Paper} to Lyle on 2F to develop.

A Recording of the Visitor, which you can give to Beryl. In the basement there is a Security Room with the Panopticon boss. Defeat it, then place the {Guinea Pig} in the chair. Change the feed until they turn into a monster, which is confirmation that the feed was the correct one. Record the feed on the {Blank Tape} from the Convenience Store on the ground floor.

A Manuscript of the Visitor, which you can give to Jasper. On 2F after fixing and using the elevator, in the apartment with the Typewrither. The correct manuscript is the {Loose Manuscript}, after adding an additional page from the typewriter.

Defeat the Exalted Four, then when the Visitor offers to let you see it's true form, you must ACCEPT.


Denial

Looked away from the visitor's true form.

Give 4 correct offerings of the Visitor to Jasper on the ground floor, then meet on the roof.

The correct offerings are:

A Painting of the Visitor, which you can give to Aurelius. It can be found in Frederic's Apartment on 1F. Get a {Canvas Bag} from Fake Frederic, then touch all the paintings in Fred's backroom until you find and retrieve the painting that is BLUE and WET.

A Photograph of the Visitor, which you can give to Aster. Starts with the {Void Disc} and Telescope on 3F. Turn it into the {Negative Disc}, then place {Photo Paper} in front of the Projector in the Golf Room in Victor's Apartment on 3F. Take the {Exposed Paper} to Lyle on 2F to develop.

A Recording of the Visitor, which you can give to Beryl. In the basement there is a Security Room with the Panopticon boss. Defeat it, then place the {Guinea Pig} in the chair. Change the feed until they turn into a monster, which is confirmation that the feed was the correct one. Record the feed on the {Blank Tape} from the Convenience Store on the ground floor.

A Manuscript of the Visitor, which you can give to Jasper. On 2F after fixing and using the elevator, in the apartment with the Typewrither. The correct manuscript is the {Loose Manuscript}, after adding an additional page from the typewriter.

Defeat the Exalted Four, then when the Visitor offers to let you see it's true form, you must REFUSE.


Open Your Eyes

Performed a flawed ritual.

Give 1-3 correct offerings of the Visitor to the 4 Astronomers, then meet on the roof. Defeat the astronomers who transformed (with the correct offerings) once it happens!

Note: You can kill Jasper and get the {Roof Access Key} early, then just tell 1 of the other Astronomers (that you gave a correct offering) that Jasper went up there to trigger this ending early.


No Going Back

Survived 15 days.

Simply wait 15 days and then leave your front door.


Screaming Sky

Ran from the exalted four.

Give 4 correct offerings of the Visitor to the 4 Astronomers (see "Truth" and "Denial"), then meet on the roof. When speaking with the Exalted Four, you must RUN AWAY instead of trying to fight.


Failure

Completely failed the ritual.

Give NO correct offerings of the Visitor, then meet on the roof. If you kill Jasper, you can get the {Roof Access Key} early, and just go upstairs to trigger it immediately.


XIN-AMON

Defeated the True XIN-AMON.

Give 3 correct offerings of the Visitor and the {Guinea Pig} Cinnamon to the 4 Astronomers, then meet on the roof. You must successfully defeat the true XIN-AMON once the transformation happens.


Eternity

Was defeated by XIN-AMON

Give 1-3 correct offerings of the Visitor and the {Guinea Pig} Cinnamon to the 4 Astronomers, then meet on the roof. You must then lose to the true XIN-AMON once the transformation happens. Note: you can make it go faster by un-equipping armor and just guarding. All enemies will evolve and do more damage over time.


Promise

Keep your promise.

Speak with all 4 Astronomers until you find out that Sybil was a fellow Astronomer, and was the first one that actually saw the Visitor. Once you have this information, confront Jasper about Sybil and he'll hand over {Jasper's Key}.

Take the key over to F1 Apt 12 right across from the Mouth Monster's Apt 13. In the back of that room, barely visible, will be a place behind the growth that you can use the key.

In the main living room of Apt 12, look where the growth on the ground is gravitating towards on the west wall. You will find a hidden door there that you can reveal with {Herbicide}.

The hallway behind the hidden door there will be a hallway with a keypad. You can find the code from Sybil's Notes in the kitchen. The code will be 187552.

Inside the Planetarium, you'll need to insert planetary Discs in this order, starting at the center: Sun, Mercury, Venus, Earth, Mars, Jupiter, Saturn, Uranus, & Neptune.

In the southern room that opens, pick up the {Telescope Pieces}. Also retrieve the {Apt 35 Key} in the Planetarium's large pillar room. Take the telescope pieces to Jasper to repair them. Give the {Telescope} to Sybil in her Apt 35 on F3. Promise her you won't investigate further, then perform a Perfect Ritual.

When you talk with the Exalted Four, you'll get the chance to bring up Sybil and officially trigger the Promise ending.
Achievements - Endings 2
Unity

Truth shall set us free.

Speak with all 4 Astronomers until you find out that Sybil was a fellow Astronomer, and was the first one that actually saw the Visitor. Once you have this information, confront Jasper about Sybil and he'll hand over {Jasper's Key}.

Take the key over to F1 Apt 12 right across from the Mouth Monster's Apt 13. In the back of that room, barely visible, will be a place behind the growth that you can use the key.

In the main living room of Apt 12, look where the growth on the ground is gravitating towards on the west wall. You will find a hidden door there that you can reveal with {Herbicide}.

The hallway behind the hidden door there will be a hallway with a keypad. You can find the code from Sybil's Notes in the kitchen. The code will be 187552.

Inside the Planetarium, you'll need to insert planetary Discs in this order, starting at the center: Sun, Mercury, Venus, Earth, Mars, Jupiter, Saturn, Uranus, & Neptune.

In the southern room that opens, pick up the {Telescope Pieces}. Also retrieve the {Apt 35 Key} in the Planetarium's large pillar room. Take the telescope pieces to Jasper to repair them. Give the {Telescope} to Sybil in her Apt 35 on F3.

You'll now get the option to Attack Sybil. Do it! Win the fight (you can weaken her by killing organ monsters throughout Meat World) and get the {Small Red Key}. Use it in the Planetarium room and read the note that's inside.


Words of Power

Speak the forbidden words.

Completely finish the {Crossword Puzzles} book from Lyle's Apt, and get the 5-digit randomly generated code at the end.

Go into the room behind the door that is locked by the {Pluto Disc} in B1 Storage (i.e. Steve's room) Use the code you received on the safe.

Inside, you'll find the depths of the legendary Crossword Dungeon! If you have Morton, be sure to bring him for a leg up with some puzzles, and a lot of bonus dialogue.

At the end of the dungeon when you begin speaking with Wilhelmina, choose the option to speak the "Words of Power".


True Final Ending

The true canon ending of Look Outside.

Get as many Door Encounters as you can until you run into the Gamer. Make sure you have $120 to buy {Massacre Princess} from him. Do NOT take the $200 he offers to buy it back OR the {Katana}, make sure you that you KEEP the game!

Play through all 12 sessions (28 hours total!) of the game until you learn {Meteor Strike}!

All 4 Astronomers will all have a dialogue choice with the word "kill" in it, along the lines of "Why not kill it?" or "...I think I could kill it." Speak with all of them and make sure to choose that dialogue option for EACH of them, 4 in total.

Perform a Perfect Ritual, and defeat the Exalted Four. When you first get the chance to speak to The Visitor after he takes you apart and puts you back together again, choose the new hidden option now revealed: "(Attack!)"

Attack it until it says "I'm going to make you disappear." You MUST deal enough damage to trigger this dialogue. 200-300 damage from regular attacks was enough to guarantee that The Visitor said something new every single turn.

Afterwards, Sam's {Meteor Strike} will now cost 1 STM instead of 999! (I sure hope you have at least 1 STM) Use it!

Win the resulting fight to trigger the True Final Ending.


Look Inside

Have some time to yourself and let go.

First, you MUST make friends with the Shadow. I have details for that here in this elsewhere in this guide; getting the {Rose} for maximizing friendship is a requirement for this progressing this ending. You must also befriend it ASAP, as there is a bit of a time limit, so try not to miss any days talking to the Shadow.

Next, you need to retrieve 4 Cursed Offerings, bring them to the 4 Astronomers, then perform the ritual on the roof. The 4 Cursed Offerings are:

- {Wrapped Painting} - Found in B1 Pit. Head south of the B1 Parking Garage and to the left of Stuart to find a hole you can jump down to find Charan. He will leave on Day 8, so you'll need to be quick!

Give him the {Rose} received from befriending the Shadow, and he'll leave the next day. Jump down the hole to find the painting at the end, guarded by a powerful Shade.

- {Last Will} - Find the {Unlabeled Cartridge} behind the 2 locked Disc doors near Jasper (Ground Floor), then play it in Spine's Room (i.e. turn the lights off in Apt 31, then go to the corrupted version of your living room). Navigate the "Glitch World" to find it near the end.

- {Old Tape} - Found on F4. Must play the "Elevator Game" to get there. The hint for this is found written inside Marshall's stall in the GF Men's Bathroom after Rafta & Nestor unite.

The code is 0-3-1-2; that is, use the elevator to go to the Ground Floor, then F3, F1, and finally F2 to have F4 show up as a new elevator button. Navigate the "Metro" area to find the tape at the end.

- {Old Photograph} - Found in the Landlord's Apartment on the Ground Floor. There's a hidden wall at the very top of the {Wraithscourge} room that can be blown up with a {Sapper Charge}. The photograph is behind it, guarded by a powerful Shade.

Give the Cursed Offerings to all 4 Astronomers, then meet them on the roof. Prepare for some difficult fights!
Achievements - Challenges
Miasma

Reach an ending without taking a shower.

You'll miss out on the Calm +10, Hygiene +60 and Morale +4 (i.e. massive hidden status boosts) from the showers, but otherwise you'll be just fine without embracing the hygienic lifestyle.

I don't recommend trying to get it on your first playthrough since your main character will voice their thoughts on most things that are happening to them, akin to a hint system (and the writing in this game is wonderful, so try not to miss out!)

See the "Challenge Achievements Run Guide" section below to get this achievement and the others all at once!


Loner

Reach an ending without making any friends.

This one is a decently difficult challenge, as adding more party members is a massive force multiplier for battles. Just be sure to refuse any party members, and you'll trigger this one no problem (see above for Party Recruitment achievements so you know who to avoid)

Temporarily recruiting Ernest on F1 is the ONLY exception to this rule, as he doesn't currently count towards the final tally for "Loner".

See the "Challenge Achievements Run Guide" section below to get this achievement and the others all at once!


Insomnia

Reach an ending without sleeping once.

Sleeping is totally optional as you can quite literally stay up as long as you want (and simply become "Exhausted" which reduces your stats)

See the "Challenge Achievements Run Guide" section below to get this achievement and the others all at once!


Ascetic

Reach an ending without eating a single meal.

Fairly simple to achieve this one; all you need to do is avoid using the oven in your kitchen at all! You can still eat all of your inventory food to solve your HP, STM, and hunger problems.

See the "Challenge Achievements Run Guide" section below to get this achievement and the others all at once!


Gamer's Bane

Reach an ending without playing a video game.

This one's pretty simple; the skills from the video games are mainly nice to have, and aren't required to beat the game if you're fairly thorough (or playing on Easy)

See the "Challenge Achievements Run Guide" section below to get this achievement and the others all at once!


Long Weekend

Reach an ending in only 3 days.

You're very likely to combine this one with many of the other challenge achievements (like "Insomnia"), especially given the debilitating status effects for the hidden stats dropping when you drag out the playthrough for too long.[/spoiler]

See the "Challenge Achievements Run Guide" section below to get this achievement and the others all at once!


Cold Shoulder

Only spoke to Sybil once.

NEW v2.0 Challenge Option: On Survivor (Normal) Mode or Cursed (Hard) Mode, at the beginning of the game, ask Sybil to NOT check up on you to officially enable Ironman Mode. You'll only be able to save at your bed twice in total, so make them count!

Important Note: Only the semi-successful Ritual Endings count for this achievement! Be sure to make one of your limited saves just before completing an ending, just in case.
Cursed Mode Exclusives & Strategy
Last Update: 2025/11/24

[3F Hallways]: Victor's Apt 37 and all of Apt 36's doors are now open at the very start of the game, BEFORE encountering your Wounded Neighbor.

[3F Victor's Apt 37]: The Crafting Kit is no longer easily retrieved from the table in Victor's living room. It's now found in the bathroom behind the Gawker.

[3F Witness Enemies]: Onlookers will all slowly mutate further into much tougher and stronger Observers, Gawkers, and Witnesses. So, if you stall in a fight, they'll get much more difficult, but also reward more EXP! You can run away to "reset" them, though.

[3F Neighbor's Apt 36]: Your Wounded Neighbor now has a second phase that is MUCH harder. It's now treated as a gatekeeping boss fight before progressing to 2F. Strategy: Learn {Jump Attack} & {Nitro Boost} from playing {Super Jumplad} & {Madwheels 97} respectively. Your MC should be level 4 just from playing video games by then; spam {Jump Attack} for a much needed damage boost since you're by yourself (unless you get lucky on Day 1 door recruits)

[2F Hallways]: Running from Leigh has a few additional wrenches thrown in for good measure (not the same "running away" hallway on easier difficulties). Strategy: Go to the bottom of the stairwell for the {Pool Cue}, then use the {Skewer} & {Impale} abilities for massive damage. Also, if you defeat her, she'll say she "found a handgun" for $100. If you refuse to pay, she'll eat it and it'll be gone forever, so make sure you brought enough cash!

[1F Hallways]: Besides the usual confusing 1F layout, there is an ADDITIONAL set of dead ends thrown in on Cursed Mode. If you encounter a dead end, then you'll be stuck unless you find a way out to the "normal" map. Try to avoid it by staying mostly within the vertical hallways.

In one of these new dead ends, you will also find a unique "Winged" enemy to fight, worth a decent chunk of EXP if defeated.


[1F Fred's Apt]: The location of the correct {Painting} in Fred's backroom (the darkened room) will be different than it is on the other difficulties. It should be leaning against the middle table in the upper right room instead (next to where Shadow Fred was)

[B1 Apt 1]: Fighting Antoine is now MANDATORY, as the door to the Sewer is now locked by {Antoine's Key}. The fight is also significantly harder!

[B1 Apt 2]: When you fight Clyde, he now comes with 4 kids in tow! Angel in the back will eventually turn into the Angel Of Death, who drops the powerful {Angel's Bat}!

[B1 Apt 2]: The bathroom door is locked, and you need 3 keys from enemies in the apartment to open it. The {Uranus Disc} can now be found in here, instead of it's usual place in the other difficulty modes.

[F3 Party Member]: Joel now requires 8x {Toothpaste} to recruit.

[GF Party Member]: Papineau now requires 6x {Cleanerex} to recruit.

[Items]: The {Lockpicks} from Mutt's Shop now also have a chance to break!
Challenge Achievements Run Guide
The 7 Challenge Achievements awarded after beating the game are:
  • Long Weekend - Beat the game in 3 days or less.
  • Gamer's Bane - Did not play any video games.
  • Insomnia - Did not sleep once.
  • Miasma - Did not shower once.
  • Loner - Did not make any friends.
  • Ascetic - Did not eat any meals.
  • Cold Shoulder - Only spoke to Sybil once (i.e. Ironman Mode/No Saves)


If you do it right, then these (+ "Cold Shoulder") will all pop at once!


Important Challenge Notes; regardless if you follow this guide OR attempt it yourself:
  • Difficulty does NOT matter for these 7 achievements, so I highly recommend starting on Explorer (Easy) Mode. This will give you a massive advantage with auto-save (does NOT currently count against you for the "Cold Shoulder" achievement) and much lower enemy stats.

  • Temporarily recruiting Ernest on F1 by giving him a sandwich (the first assist is free on Explorer Mode) does NOT currently count as "making a friend" for the "Loner" achievement, so take him with you at will!

  • Only Semi-Complete Ritual Endings count for ALL 7 of these achievements, so you CANNOT cheese it with a "No Going Back" or "Failure" ending (for example) The easiest ending that qualifies is the "Flawed Ritual" Ending.


Without further ado, these are the steps you can take for completing ALL 7 challenge achievements in one playthrough quickly and somewhat easily:
  1. [3F]
    Leave your apartment and follow the trail of blood to the left
    Pick up and equip {Baseball Bat}
    Enter bathroom, kill Wounded Neighbor, take all items
    Go towards apartment entrance until side room opens; enter that room
    Pick up and use {Simple Key} on safe to get [$200] and some coins
    Head to the stairs the end of the 3F hallway to the right
    Open stairwell doors, go to the bottom to get {Pool Cue}, then go to [2F]

  2. [2F]
    Go all the way to west side of the hallway
    Grab the Key for Apt 21
    Defeat the Grinning Beast for EXP (use {Pool Cue} ability [Impale])
    Unlock and enter Apt 21
    Go through the bathroom in the top left and follow it downstairs to [1F]

  3. [1F] (See the "Simplified F1 Map" in the "Maps" section below for your own directions)
    Go →↑↑, enter west door, temp recruit Ernest (doesn't count against "Loner")
    Go ↑→, enter south door, get the Rat Child
    Go ←↓→, enter Apt 13 door, feed the Mouth (sorry buddy!), pick up {Earth Disc}
    Go →↑↑←, insert disc, enter Apt 11 door
    Avoid or kill the Rat Freak (weak to [Crush]), get {Mars Disc}, leave
    Go →↑↑→, unlock and enter the F1 stairwell
    Go downstairs, use the {Earth Disc} & {Mars Disc} to unlock the [GF] door

  4. [GF]
    Buy Candy with all of your {Quarter} coins
    Get some coffee (STM recovery) & some change (even more quarters)
    Upgrade your stats if you got some Rare Candies (keep a few for easy recovery)
    Visit Mutt's Shop, buy anything useful + the {Pitchfork}
    Go back to [1F]

  5. [1F]
    Go ←↓←, enter Fred's Apt, Get the {Painter's Key} from from Fred
    Kill 3 other Freds (Bright, Scared, Shadow, Tumor, and/or Wiggly recommended)
    Get the {Canvas Carry Bag} from Frederic
    Grab the real {Painting} in the upper left of the room (wet and blue paint)
    Give it to Aurelius across from Fred's Apt
    Go →↑→, enter stairwell and head back to [GF]

  6. [GF]
    Go back to Jasper, then attack him
    Kill Jasper with the {Pitchfork} Skill [Penetrate] for massive damage
    Get the {Roof Access Key}
    Head back to [1F]

  7. [1F]
    Talk to Aurelius, tell him Jasper has gone to the roof
    Go to the [Roof]

  8. [Roof]
    Talk to Aurelius
    Defeat the Chorus of One!
    Get the Flawed Ritual Ending & ALL 7 Challenge Achievements!


ALL 7 Challenge Achievements in ONE Day - No Commentary
More of a visual learner? If so, then please check out this no frills video walkthrough that shows the exact path I took to get all 7 Challenge Achievements Quickly & Easily (around 30 minutes)

Complete Video Game & Skills List
Full list of the 20 video game cartridge locations in the order they'll be displayed on your shelf, as well as what skills they teach after completing it:

01 {Wake the Blood Knight}
Location: Found on 3F Apt 34 just past the boss, Pompom. You'll need enough {Ice Melt Salt} to get it.

Skill: Teaches {Blood Madness} after 4 sessions (8 hours) - "Driven mad by blood! Need to be bleeding to use. Lose control, but become resilient and deadly." Costs 5 STM.

02 {Wizards Hell: Arcane Tears}
Location: Found in Vincent's Apt 37 on 3F in the Golf Room.

Skill: Teaches {Painful Stab} after 10 sessions (13 hours) - "Cause a small but very painful wound. Pain reduces accuracy and subtracts 1/10th of HP every turn." Costs 2 STM.

Inspired By: Dungeon Keeper

03 {Super Jumplad}
Location: You start the game with this in your collection.

Skill: Teaches {Jump Attack} after 2 sessions (4 hours) - "Weapon attack boosted by your agility. Slightly increased chance to damage your weapon." Costs 2 STM.

Inspired By: Mario

04 {Super Jumplad 3}
Location: Bought from the Gamer who randomly shows up at your door for $60.

Skill: Teaches {Numbness} after 5 sessions (9 hours) - "Lose 10% of current life, but become immune to most status effects for 10 turns." Costs 5 STM.

Inspired By: Mario, Strange Sequels

05 {Catafalque}
Location: Found in the sewers. It's at the end of a hallway right of the 2nd lever, which you need to activate to open the metal bars blocking the door.

Skill: Teaches {Risk Taker} after 4 sessions (8 hours) - "Boosts melee attack and ballistics, but also increases all damage received for 3 turns." Costs 4 STM.

Inspired By: Castlevania

06 {Honko's Grand Journey}
Location: Found in Frederic's Apt on 1F in the dark painting room.

Skill: Teaches {Cash Sock} after 4 sessions (8 hours) - "Attack based on accumulated booty. Lose 5% of treasure at every use." Costs 2 STM.

07 {Madwheels 97}
Location: You start the game with this in your collection.

Skill: Teaches {Nitro Boost} after 5 sessions (10 hours) - "Boost your party's AGI and Evasion by 30% for five turns. Also helps to stave off sleep actions." Costs 3 STM.

Inspired By: Racing Games, Mario Kart, Need for Speed

08 {Wraithscourge}
Location: Found in the Landlord's apartment on the Ground Floor (GF), when it's in the final mutated state with the Grave Digger boss. There is a room to the west of where you blow the rubble with a sapper charge to find the Old Rifle. In that room, take the south east door and it will lead you to this game on a table!

Skill: Teaches {Dungeon Dance} after 4 sessions (8 hours) - "Move in, attack, move aside! The combat waltz of all dungeon crawlers. Counterattacks for four turns." Costs 2 STM.

Inspired By: Dungeon Crawlers, Wizardry, Might & Magic, King's Field

09 {Massacre Princess}
Location: Bought from the Gamer who randomly shows up at your door for $120. He'll ask for it back if you buy it; stay firm, refuse the money, and the katana (another achievement) to keep it!

Skill: Teaches {Meteor Strike} after 12 sessions (28 hours) - "Rush Braver's forbidden technique." Costs 999 STM! (Unless...?)

Inspired By: JRPGs, Final Fantasy, Dragon Quest

10 {Kill to Shoot}
Location: Found in Apt 32 on 3F after playing with Ben and getting the best result (see the "One last game" achievement)

Skill: Teaches {Aim The Killshot} after 4 sessions (8 hours) - "Aim carefully for that next attack..." Costs 2 STM.

Inspired By: Modern FPS Games, Call of Duty

11 {Myrmidon}
Location: You start the game with this in your collection.

Skill: Teaches {Combat Medic} after 7 sessions (14 hours) - "Heals 25% life to one target in battle, but has a 25% chance to cause bleeding." Costs 4 STM.

Inspired By: Strategy Games, Fire Emblem

12 {Myrmidon XII}
Location: Found in the convenience store on the Ground Floor (GF)

Skill: Teaches {Garrison} after 6 sessions (10 hours) - "Stay put, but increases ballistics, ballistic defense and shooting crit rate for 4 turns." Costs 3 STM.

Inspired By: Strategy Games, Fire Emblem

13 {Screamatorium}
Location: Found by interacting with the left side of the bookshelf in your living room multiple times.

Skill: Teaches {Screamer} after 4 sessions (6 hours) - "Aaah! Chance to cause panic on all enemies. How obnoxious!" Costs 4 STM.

14 {Frogit About it}
Location: Found in the bathroom of the Jungle Apt on 1F.

Skill: Teaches {Croak Orders} after 5 sessions (8 hours) - "Boss an enemy around into fighting for you! Can charm one target for up to 4 turns." Costs 4 STM.

15 {Blood Ghoul Orgy 3}
Location: Bought from the Gamer who randomly shows up at your door for $60.

Skill: Teaches {Hurt Me Plenty} after 4 sessions (8 hours) - "Taunts enemies into attacking you, and reduces incoming damage by 25% for 5 turns." Costs 3 STM.

Inspired By: Space Funeral (another RPG Maker classic)

16 {Octocook}
Location: Bought from the Gamer who randomly shows up at your door for $60.

Skill: Teaches {Octostrike} after 4 sessions (6 hours) - "Attack random targets 8 times in a row." Costs 8 STM.

17 {Space Truckerz}
Location: In the room behind the growth (requires {Herbicide}) in Lyle's Apt on 2F.

Skill: Teaches {Long Haul Flow} after 4 sessions (8 hours) - "Lose control of Sam for a few turns but recovers 10% STM a turn." Costs no STM!

Inspired By: Desert Bus, Euro/American Truck Simulator

18 {Reptile Football}
Location: Found in Eugene's Shop on 2F. You need to "Level Up" his shop by spending enough money over several days. This "Level Up" happens at 5 AM the next day, and they occur when these total amounts have been spent so far: $75, $150, $300, $400, and $500 (for $1425 overall total) At maximum level, he will finally have it for sale!

This is missable if Nestor has replaced Eugene, as his inventory becomes "frozen". It's also missable if you don't have enough days left to completely "level up" the shop for him to offer it.

Skill: Teaches {Running Tackle} after 4 sessions (8 hours) - "Ram into the target. Receives a damage bonus from your defense." Costs 1 STM.

19 {Crossword Challenge}
Location: Found in Mutt's Fish and Chips shop on the Ground Floor (GF), after some days have passed.

Skill: Teaches {Confusing Word} after 5 sessions (8 hours) - "Use a powerful word. May confuse all enemies." Costs 5 STM.

20 {Unlabeled Cartridge}
Location: Found on the Ground Floor behind 2 locked Disc doors, right next to Jasper. 1st door solution: Earth [1] + Uranus [28] 2nd door solution: Mars [2] + Sun [13]

???: Try using the TV in Spine's Room (i.e. your warped living room from Apt 31 on F3)


All Video Game Party Interactions - Full Playthroughs - No Commentary
If you're curious about all the possible party member interactions as well, then I've also chronicled them all for you all here!

Side Quests & Optional Content
Included here are additional Side Quests & Optional Content that don't easily fit within any particular Achievement Description above. They can also be re-used for future reference on repeat playthroughs!


Frederic's Apartment (F1)


Frederic's Apartment can be found on the 1st Floor (F1) labyrinth across from Aurelius' Room, one of the Astronomers looking for observations of the Visitor. You can just get the {Painting} key item, leave and ignore everything else, but if you stick around there's some great additional things to do here!

When you first enter you'll see Frederic, the Painter. All the other doors are locked. Speak with Fred and he'll ask you for help with his 9 paintings that have come to life and are "plotting something". He'll then give you the {Painter's Key} and also tell you about Wriggly Fred in the fridge.

Nearly ALL of the 10 Freds will talk to you and try to convince you to help them in some way. Here's the lowdown of all the Freds and their Quest Rewards:

Frederic, the Painter: (a.k.a. Fake Fred/Face Taker) The first one you talk to after entering. He rewards you as you start killing the other Freds around the apartment.

Those rewards in order they're given are:
1 other Fred - 4x {Turpentine}
3 other Freds - a {Canvas Carry Bag}
6 other Freds - 6x {Bandages}, 2x {Tonic}, 1x {First Aid Kit}
ALL 9 other Freds - a {Paint Palette} which is "A mysterious paint palette, held in place of a ranged weapon. Adds random status effects to melee." (-5 ATK)

Killing him as the Face Taker rewards a {Paint-Stained Apron}, a {Beret}, a {Torn-Off Face}, the {Canvas Carry Bag} (if you don't already have it) and the "Identity Crisis" achievement.


Bright Fred: Heals your party once a day.

The reward for killing all 9 other Freds is a much larger party heal from Bright Fred once a day, as well as a portable {Medic-in-a-jar} item that can ALSO heal you once a day, anywhere. Using it will heal MOST of your party's most common status effects, and restore about 50-60% HP!


Wriggly Fred: Can be found in the fridge after getting the {Painter's Key}.

The reward for killing all 9 other Freds is the refrigerator, a thank you, and his friendship...! He'll also hang out in your apartment's fridge, huzzah!

Later in your apartment, randomly after a dinner, if you accept his "decision" (he won't tell you what he's deciding) then you can become an honorary Fred and be gifted the {Fred Ring}! It is "A ring gifted by Wise Fred. Increases agility and evasion rate." (+4 AGI)


Godhead Fred: In the back (trying to scam you). Provides the "Just some guy" achievement if you get him to drop the act.

The reward for killing all 9 other Freds is $400 if he had dropped the act, otherwise, it's a jewelry accessory called the {Strange Feather} which is "A peculiar feather gifted by a godly being. Reduces all damage taken by 10%." (+10 LUK, +5 AGI/Max HP/Max STM)


Fred Who Bites: Provides the "All you need is love" achievement if you talk and ask if there's "something to get his stress down" and suggest "Uh... a hug?", then go ALL IN.

The reward for killing all 9 other Freds is {Rage Armor} which grants "+50% attack, and gain a chance to counterattack. Rage at battle start, and weakness to rage." (+5 DEF/BDF/AGI)


Toxic Fred: The one that tries to trick you with the hat.

To get the {Stained Key} you need to kill both Toxic Fred and ALL of his Green Paintling minions around the apartment as well.

There should be 9 total you'll need to defeat:
2 Green Paintlings in the Living Room
3 Green Paintlings in the Fake Cowboy Hat Room
1 Green Paintling in the South Hallway
2 Green Paintlings in the North Hallway
and the "Not A Cowboy Hat" minion

The reward for killing all 9 other Freds (with the hat on) keeps the hat stuck to you, but now becomes the {Eyeball Hat} which "Protects from Blind and Sleep. Teaches Toxic Dance. Grants a 20% chance to Poison on normal attacks." (+4 DEF/BDF)


Scared Fred: Hides in a closet. There is a kind of "fear" level at play here, so to get him to come out, you'll either need to reduce his fear!

Factors:
- Party Members 1: Alone, or Joel & Sophie (-fear)
- Party Members 2: Hellen, Papineau, & Leigh (+fear)
- Weapons 1: No weapons (-fear)
- Weapons 2: Melee & Guns (+fear)
- Items: Give him a juice box or a soda (-fear)

You can also pry open the closet doors with enough damage!

The reward for killing all 9 other Freds is the {Cowardly Boots} which "Doubles combat escape chance and halves wearer's chance to be attacked." (+4 AGI)


Tumor Fred: Found in the bathroom.

The reward for killing all 9 other Freds is a {Tumor Lump} throwable combat item, retrievable once a day when you run out. If you leave ANY remaining {Tumor Lump} items in your inventory overnight (at around 4 AM), they will split & duplicate! You can easily keep doing this until you max out at 99!


Shadow Fred: Found in the top right of the darkened painting room.

Currently the ONLY Fred that doesn't provide a reward for killing all the other Freds.


Faceless Fred: (a.k.a. Real Fred) The faceless one locked away in the back (his face was stolen by Fake Fred/Face Taker).

The reward for killing all 9 other Freds is a one time use to duplicate a piece of non-weapon equipment! Takes 1 day to finish.


Frederic Interactions & Quest Rewards - Video Guide - No Commentary
If you're still curious about all the interaction possibilities and visible quest rewards not covered here, then please check out this no frills video walkthrough (if you are so inclined!)

Side Quests & Optional Content 2
Included here are additional Side Quests & Optional Content that don't easily fit within any particular Achievement Description above. They can also be re-used for future reference on repeat playthroughs!


Fungus Lair (B1)


The Fungus Lair area can be found in the Basement (B1), just south of the friendly monsters beyond the sewer maze area. This entire area is optional since the {Neptune Disc} can be found halfway through, and is not actually required for any of the current endings!

Many achievements can be found here, and some are quite missable if you are not careful. Regardless of what difficulty you're playing on, be sure to save before attempting it for the first time, and even after making significant progress.

For a full experience on your first (or future) playthrough, be sure to do the following:

Phillippe 1: Recruit him by sending someone home, OR by coming with 3 or less party members.

Laughing Mold 1: Get trapped in the east part of the 2nd puzzle room to be exposed to Laughing Mold's routine. If you clear the final boss of the area first, then he'll disappear, and you'll miss your chance! You can either be friendly with him and entertain his comedy routine, or simply fight him for the achievement.

Laughing Mold 2: If you make friends with him then defeat the Spore Queen, he'll be safe and hang out with the friendly B1 monsters to the north.

Spore Queen 1: Goaded by Phillippe after reaching the "Princess", Hug her the for the achievement when given the chance (save first). You do not need to be exposed to any spores to do this.

Spore Queen 2: The fight can get tricky if your party is highly susceptible to the [Charm] status effect. Bring both [Charm] resist Gear as well as [Poison] resist Gear, if you can. She's also susceptible to most status effects & [Acid] damage, but resistant to [Crush] damage.

Spore Queen 3: Be sure to clear out most of the zone first before fighting her, as the entire area will completely cleared of all enemies, including all of their EXP and money!

Phillippe 2: Get {Phillippe's Remains} by waiting until turn 2 after getting him to reveal his mushroom form. This can be done either at the exit of the zone OR with the Spore Queen.

Then say "The fungus got into your brain...?" -> "Don't worry Phillippe. I'll save you!" -> "Don't worry Phil. I don't believe his lies." -> "You're my only friend Phillippe. I'll find a way." and then killing him and any of his cohorts!


Phillippe 3: To permanently recruit Phillippe, follow all above steps to make sure that you get {Phillippe's Remains}, then take his corpse back home to nurse him back to health!


Curious about some of the possibilities for dialogue choices in this area? If so, check out this video showing a full playthrough of the zone, as well as some alternative decisions and interactions!


Secret Path: And a secret Superboss! On the very easternmost side of the Spore Queen's room, there is a hidden path in the wall. At the end of that path is Swordmaster Comatus, who challenges you to a duel! You may want to come back later, and more prepared, before attempting this fight.

The deadliest yoga instructor we've encountered thus far...
Hidden Secrets w/out Achievements
***MAJOR SPOILER WARNING BLOCK***

***MAJOR SPOILER WARNING BLOCK***

A LOT of effort went into hiding these. They don't even have Achievements, in an attempt to keep them even more secretive! If you want to discover them for yourself, then stay away! For everyone else...


Somewhat Hidden Secrets
Somewhat Hidden Secret #1:
How To Repair (and upgrade?) Fuzzy

If you have invited Joel & the Rat Child into your home, there's now a chance that home interactions between the two of them cause {Fuzzy} to get destroyed! (it will turn into the {Fluff Ball}, still locked to Joel's Weapon slot)

Afterwards, the Rat Child will apologize to Joel and try to return some of the shredded pieces, and the {Fluff Ball} now becomes {Fuzzy's Remains}. Joel will mention that we can try to get it repaired...

- Fuzzy Repair Method 1: Eugene -
Speak with Eugene when Joel is in the party, with {Fuzzy's Remains}.

After a day, he'll restore it to {Repaired Fuzzy} (Immune to Rage/Confusion/Panic)

- Fuzzy Repair Method 2: Main Character (Sam) -
If Eugene is dead, you'll be able to get to the back of Eugene's Apartment. The bookcase in his bedroom hides a secret entrance to a hidden backroom. Inside, you'll find a Sewing Machine; bring Joel with you and you'll make an attempt to repair {Fuzzy's Remains}!

Immediately afterwards, it will become {Mangled Fuzzy} (+6 DEF/BDF)

- Fuzzy Repair Method 3: Nestor - (if you gave it to Eugene)
If you gave {Fuzzy's Remains} to Eugene, BUT he didn't finish repairing it before getting "assimilated" by a Worm-ified Nestor, then he'll volunteer to finish it on his behalf.

After a day, he'll "repair" it and you'll get {Worm Fuzzy} (+3 ATK/DEF/BLS/BDF/AGI/LUK, +20 Max HP, +10 Max STM)

- Fuzzy Repair Method 4: Xaria & Monty - (after Rat learns to talk)
In the various home interactions (Post-dinner chats & talking to the Rat Child), Xaria will (unfortunately) kick the Rat Child. You can tell Xaria to apologize to the Rat Child after threatening to kick them out, OR the Rat Child themselves will (eventually) get Xaria to apologize.

Once they patch things up (after some more home interactions) the Rat Child will ask Xaria to fix up {Fuzzy's Remains}, which results in {Renegade Fuzzy} (+10 ATK)

So many ways to fix a Fuzzy! Fantastic!


Somewhat Hidden Secret #2:
How To Recruit Marc-André

At the northernmost tip of the F4 Metro, accessible after playing the "Elevator Game", you'll find Marc-André, the Sadipede. He'll ask you to let him win... and you can actually do it!

If you let him defeat you, then after the battle: talk him up by saying "you're so cool" and he will join your party (sort of) by hanging out in your inventory and "assisting" in battle!

He's so cool! He's the FIGHTMASTER!


Somewhat Hidden Secret #3:
How To Help Spider Husk

Find out about Sybil from the other Astronomers, then confront Jasper about her and he'll hand over {Jasper's Key}.

Take the key over to Apt 12. In the back of that room, barely visible, will be a place behind the growth that you can use the key. Use {Herbicide} on the bathroom door to find the Spider Husk.

Talk to them and choose these options: "What are you?", "What happened to you?", "Don't say that./I think you matter./I sometimes feel that way too.", "I think I'll remember you.", "You can grow into a real human."

After that, you can help them choose a name and a gender! You can name them yourself, or let them choose both.

You'll help detach them from the room, then they'll start to walk around on their own. Stay and help them if they fall over 4-5 times until they say "I think I can do the rest on my own." then leave and come back to check on them after some time has passed.

After about 24 hours or so, they'll have learned enough to walk all the way to Mutt's shop! Talk to them and receive the {Beating Heart}.

Help them choose their own identity and make some friends!
Hidden Secrets w/out Achievements 2
Extremely Hidden Secrets
Extremely Hidden Secret #1:
How To Find The Prisonner Room

This Hidden Secret can be found at the very beginning of the B1 Parking Garage, near where Beryl hangs out. If you have a keen eye, you can just barely make out an oddity on the northern wall just past Beryl, where the Parking Garage officially starts.

You'll see something that looks like the outline of a door on that wall. You'll know you're in the right spot if interacting with it says "Just a wall."

Check it again another 6 times (for 7 total) until it says "Uh. Wait. There is a door here." Head inside, ignore all of the warnings, and continue to open the door at the end of the hall.

Inside the Prisonner's room you'll see a gnarly scene, and a surprisingly useful {Strait Jacket} you can pick up off of the ground.

I have a feeling this will be used in future speedruns, somehow...


Extremely Hidden Secret #2:
How To Recruit Spine (temporarily)

On the way back from acquiring the {Negative Disc} from Edwin's Apartment (Apt 31 on 3F) you will encounter Spine in the corrupted version of your living room.

After getting into a fight with her, on/after Turn 4-5 you will get the option to spare her (hold back on damage since you can kill her early without the option)

On the turn that she says "Home is where the heart is", now you can start damaging her HP. Shortly after, when you get the option to do so, make sure that you "Spare her"!

Come back to visit Spine every day for the next few days. We're making friends, yes, but we're also waiting for her to mention something specific...

On the 4th/5th day she should mention hearing a noise coming from the "front door". That's your cue to bring a {Sapper Charge} from the Warzone in the Landlord's Apartment!

Blow up the meat blocking the area where your apartment's front door would be, then interact with it ALONE (i.e. no other party members in tow)

Spine will now join you temporarily while exploring the Meat World!

All About Spine! Spine Spine Spine!


Extremely Hidden Secret #3:
How To Fight Glitched Honko (Hidden Superboss)

In the Stargazer's Apartment, bring the {Unlabeled Cartridge} that is found locked behind Jasper, on the Ground Floor. Then, in the corrupted version of your living room (i.e. Spine's Room), play the cartridge.

Once inside Glitch World's hub room, navigate east twice, south once, then west once. There will be a hidden path, slightly off color, in the southernmost part of the room. This path is INACCESSIBLE if you don't own {Honko's Grand Journey}, and haven't played through at least half of the game.

Feel your way through the hidden path to fight Glitched Honko!

He's weak to [Crush] damage, and resistant to [Slash] & [Pierce] damage. Bring ways to mitigate status effects, and also deal damage and disable a group of enemies.

How To Fight Glitched Honko, and the full battle + rewards!


Extremely Hidden Secret #4:
How To Recruit The Spider

There is a hidden door underneath the B1 staircase. Note that you CANNOT interact with it UNLESS: you are alone, at max danger, and playing on Survivor/Cursed (Normal/Hard) Mode. Any other circumstance makes it completely non-operable.

The door will disappear forever if you interact with it once in a playthrough. Make note of what it says; something along the lines of "There are five dark stains on the door." (can be one through five) then reload a save.

The "dark stains" mentioned denote each of the 5 unique large Shades that can be found on each floor (F3, F2, F1, Ground Floor, and Basement) at maximum danger levels. These are the ones whose names are composed completely of question marks (i.e. "??? ?? ?????")

Kill all 5 unique large Shades in a single playthrough, then interact with the door alone, at max danger, and on Survivor/Cursed Mode. Open it, and walk through.

You will have to navigate a short maze, as well as some extremely difficult Shades that you should not be fighting alone. If you get into a battle, just run away and keep going.

At the end of the maze, you'll officially run into The Spider. Talk to them, and answer all their questions in a way such that it makes it feel "sorry" for what you're going through. Do not choose the "evil" options, as that will negate your progress!

After a while, they will attempt to mercy kill you. Instead, win the battle, and The Spider will permanently join your party!

Strategy: Use the {Combat Surge} from the Surgeon in the Landlord's Apt Warzone, and the {Invisibility Syringe} from Marvin in the Plant Apt on F1. Use the highest damage Skills & Weapons you have, before they both wear off.

How To Recruit The Spider, now in video form


***MAJOR SPOILER WARNING BLOCK***

***MAJOR SPOILER WARNING BLOCK***
Door Encounters - Merchants
When your main character is at home doing anything that passes the time (e.g. taking showers, playing video games, cooking food, etc.) there's a chance that you'll run into ANY of the encounters listed below when someone knocks on the door.

It's entirely possible to miss one or more of these in a playthrough, so be sure to save constantly and always try to answer the door (and pray to RNGsus as well). I've provided all currently known door encounters here for reference, as well as possible alternative outcomes too.

Currently, there are 3 possible door encounters on first day, then 4 possible door encounters every single day after that.

To maximize your chances of getting a door encounter you're seeking, be sure to return home often, and trigger ALL of the door encounters for the day that you possibly can! If you want to play it safe, note that there are NO door encounters at night, so you can freely explore then at the expense of your Energy/Vigor/Tiredness stats!


Food Trader
Sells a randomized selection of 9 items at a time. Currently known possibly sold goods:
  • {Cheez-Stix} [$4]
  • {Chocky Bar} [$4]
  • {Frozen Veggies} [$8]
  • {Gummi Bears} [$8]
  • {Juice Box} [$6]
  • {Lemon Drink Can} [$4]
  • {Onion-Os} [$10]
  • {Pizza Bites} [$4]
  • {Potatoes} [$5]
  • {Raw Pork} [$12]
  • {Rice} [$4]
  • {Rolling Pin} [$16]
  • {Steak Knife} [$8]
  • {TV Dinner} [$4]
  • {Vodka} [$4]


Gun Trader
Sells a randomized selection of 9 items at a time. Currently known possibly sold goods:
  • {Acid Flask} [$40]
  • {Ammo Belt} [$60]
  • {Army Boots} [$200]
  • {Combat Knife} [$40]
  • {Explosive Round} [$20]
  • {Explosive} [$60]
  • {Flak Jacket} [$960]
  • {Gas Bomb} [$40]
  • {Gatling Gun} [$1600]
  • {Grenade} [$60]
  • {High Caliber Bullets} [$16]
  • {High-Caliber Rifle} [$800]
  • {Machete} [$32]
  • {Magnum Bullet} [$25]
  • {Magnum} [$480]
  • {Molotov} [$20]
  • {Rifle Bullet} [$8]
  • {Shuriken} [$20]
  • {Shotgun Shell} [$10]
  • {SMG Bullet} [$4]
  • {SMG} [$240]
  • {Throwing Dart} [$10]
  • {Throwing Knife} [$14]


Nurse

Sells a randomized selection of 9 items at a time. Currently known possibly sold goods:
  • {Balm} [$25]
  • {Bandages} [$6]
  • {D-Clogger} [$25]
  • {First Aid Kit} [$70]
  • {Medicell} [$15]
  • {Purocare} [$25]
  • {Scalpel} [$25]
  • {Smelling Salts} [$80]
  • {Soap} [$8]
  • {Stimulant} [$120]
  • {Tonic} [$40]
  • {Toothpaste} [$12]
  • {Vinegar} [$25]


Tough Guy

Sells a randomized selection of 9 items at a time. Currently known possibly sold goods:
  • {Baseball Bat} [$20]
  • {Baseball Cap} [$12]
  • {Bicycle Helmet} [$96]
  • {Chest Guard} [$600]
  • {Energy Drink} [$24]
  • {Football Helmet} [$200]
  • {Granola Bar} [$6]
  • {Hockey Helmet} [$280]
  • {Metal Bat} [$32]
  • {Padded Jacket} [$420]
  • {Pool Cue} [$16]
  • {Rapier} [$32]


Gamer

Sells a selection of 7 items:
  • {Super Jumplad 3} [$60]
  • {Octocook} [$60]
  • {Blood Ghoul Orgy 3} [$60]
  • {Massacre Princess} [$120]
  • {Cola Can} [$8]
  • {Energy Drink} [$24]
  • {Bocky} [$10]

If you buy {Massacre Princess}, he'll ask for it back and offer $200 ($80 profit!) If you refuse, he'll offer you a {Katana} instead. If you refuse one more time, you'll get to keep it.


General Merchant

Sells a randomized selection of 9 items at a time. Currently known possibly sold goods:
  • {Anxiety Meds} [$50]
  • {Balm} [$25]
  • {Bandages} [$6]
  • {Frozen Veggies} [$8]
  • {Gasoline} [$20]
  • {Juice Box} [$6]
  • {Mop} [$8]
  • {Onion-Os} [$10]
  • {Vinegar} [$15]


Curio Merchant

Sells a randomized selection of 9 items at a time. Currently known possibly sold goods:
  • {Asbestos Amulet} [$250]
  • {Carnelian Ring} [$250]
  • {Circlet of Reason} [$250]
  • {Elixir} [$250]
  • {Eye Amulet} [$250]
  • {Gloves} [$250]
  • {Lapis Band} [$250]
  • {Ring of Alertness} [$250]
  • {Ring of Purity} [$250]


Delivery Guy (Pizza)


The Pizza guy will have varying sizes and types of pizzas, which will be high quality food items you can take with you on the go. They tend to restore lots of HP, STM, and hunger!

The known possible sizes of pizza are:
  • {Small} (4x slices)
  • {Medium} (6x slices)
  • {Large} (8x slices)
  • {X-Large} (12x slices)
  • {XX-Large} (16x slices)
The known possible types of pizza are:
  • {All-Dressed} (+28 HP +8 STM)
  • {Cheese} (+20 HP +6 STM)
  • {Deluxe} (+40 HP +10 STM)
  • {Italian} (+24 HP +12 STM)
  • {Meat Lover's} (+44 HP +4 STM)
  • {Pineapple} (+20 HP +14 STM)
  • {Rotten} (+12 HP +2 STM)
  • {Vegetarian} (+16 HP +16 STM)

It can also come with some bonus items, like {Cola Can}! Sometimes the whole order is also 50% off, or there's a "two for the price of one" deal that doubles your order.

Note: If you give him a big tip, then he's significantly more likely to show up at your door again in the future!

Has a small chance to be a corrupted encounter where he offers you a {Mad Pie} instead of the usual pizzas! Pay for it, then defeat the Pizza Monster for a {Pizza Cutter} melee weapon and 12x {Screaming Pizza} slices! This corruption chance will increase as the days go on.
Door Encounters - All Others
Dan


Simply invite him in to get a new party member & roommate!

Has a chance to be a corrupted encounter where Dan has mutated and you'll have to fight him. This corruption chance will increase as the days go on; so if you're trying to recruit him, try to get as many door encounters as you can as early as possible.


Hobbs


Hobbs is looking to trade for some ingredients (the same ones you use to cook meals for you and your roommates). If you give him some; he'll teach you some tricks and you'll gain cooking experience!


Morton


Morton accepts all your {Junk} that you've been collecting around the building. Giving him some makes it extremely likely he'll show up again.

After giving him enough {Junk} (15 or more pieces) he'll suggest "working together". After that, you can invite him in to get a new party member & roommate! You can still give him {Junk} while he's a party member, you just need to talk to him in your living room.

Has a small chance to be a corrupted encounter where Morton has mutated and you'll have to fight him. This corruption chance will increase as the days go on; so if you're trying to recruit him, try to get as many door encounters as you can as early as possible.


Hellen


Simply invite her in to get a new party member & roommate!


Xaria & Monty


Let them crash at your place and you'll get 2 party members & roommates! Note: Xaria & Monty come as a pair, you can't add them to your party separately.

Has a chance to be a corrupted encounter where Xaria & Monty are replaced by Guillaume the Limb Thief. This corruption chance will increase as the days go on; so if you're trying to recruit them, try to get as many door encounters as you can as early as possible.


Sophie


Her mom's gone missing and she needs a place to hide out. Let her hideout at your place for a new party member & roommate!


Harriet


If Sophie's in your apartment hiding out, you can re-unite them and receive an {Elixir}, 2x {First Aid Kit}, and 4x {Tonic}! Harriet will also offer help and to visit them at Apartment 22 on 2F.

Has a small chance to be a corrupted encounter where Harriet has mutated. Goes without saying, but if you notice something off, do NOT turn Sophie over to her. This corruption chance will increase as the days go on.


William


William is injured in some way, and he'll hint to you what time of healing item you can give to him to solve his problem. If you do it right and give him something appropriate, you can earn anything from $60 to $120 for helping him out.

Has a small chance to be a corrupted encounter where he has mutated and you'll have to fight him! This corruption chance will increase as the days go on.


Father Andrew


Father Andrew offers several things:
  • Talking about the outside and what's going on
  • Blessing your home (reduces chance of Corrupted/Cursed Door Encounters)
  • Food or Medical Supplies (gives more supplies on return visits if you give him donations)


Pierre


On Day 4, you'll see someone named Louis walking to the apartment at the end of the hall on the left. Follow him inside, and walk into the door on the right side of the living room to enter Pierre's room.

Speak with (and get creeped out by) Pierre, then go about your regular day. You can't re-enter his room afterwards.

When sleeping the next night, your MC will have a nightmare about Pierre. Now, your Door Encounters will have a chance to have Pierre show up!

If you do encounter Pierre knocking on your door, be sure to talk to him! Do NOT leave the eyehole, or he'll be gone forever!


Nobody (Gift)


Nobody's there, but there is a free gifted random item on the ground, how nice!


Door Encounters - Video Guide - No Commentary
If you'd like to see all of the possibilities in action, then check this out these videos! Together, they contain ALL of the current Door Encounters (as of v1.5):


Items - Crafting Recipes & Consumables
All Crafting Recipes:
  • 3x {Bandages} = {Cloth} + {Medicell}
  • 4x {Bandages} = {Cloth} + {Purocare}
  • 6x {Bandages} = {Cloth} + {Disinfectant}
  • {Tonic} = {Purocare} + {Vodka}
  • {Tonic} = {Purocare} + {Whiskey}
  • 2x {Tonic} = Purocare} + {Medicell}
  • {First Aid Kit} = {Tonic} + {Disinfectant}
  • {Smelling Salts} = {Vinegar} + {Enzyme}
  • {Disinfectant} = {Vinegar} + {Medicell}
  • {Heal Spray} = {Tonic} + {Reagent}
  • {Stimulant} = {Tonic} + {Enzyme}
  • {Anxiety Meds} = {Black Ooze} + {Medicell}
  • {Medication} = {Mushroom} + {Medicell}
  • {Elixir} = {Tonic} + {Catalyst}

  • {Acid Flask} = {Vinegar} + {Purocare}
  • 2x {Acid Flask} = {D-Clogger} + {Reagent}
  • {Gas Bomb} = {D-Clogger} + {Klysox}
  • 2x {Gas Bomb} = {Cleanerex} + {Enzyme}
  • {Explosive} = {Gasoline} + {Cleanerex}
  • 2x {Explosive} = {Klysox} + {Herbicide}
  • {Super Explosive} = {Herbicide} + {Catalyst}
  • {Molotov} = {Cloth} + {Vodka}
  • {Molotov} = {Cloth} + {Whiskey}
  • {Fire Bomb} = {Cloth} + {Gasoline}
  • {Worm Bomb} = {Worm Juice} + {Gasoline}

  • {Herbicide} = {Cleanerex} + {Vinegar}
  • {Ice Melt Salt} = {Vodka} + {Cleanerex}

  • {Caustic Brew} = {Black Ooze} + {Whiskey}
  • {Pale Fluid} = {Mushroom} + {Vinegar}
  • {Reagent} = {Pale Fluid} + {Klysox}
  • {Enzyme} = {Caustic Brew} + {D-Clogger}
  • {Catalyst} = {Reagent} + {Enzyme}
  • {Worm Perfume} = {Worm Juice} + {Pale Fluid}

Consumables - Healing & Buffs:
  • {Bandages} - Heals 20% HP & Cures Bleed (out of combat only!)
  • {Tonic} - Heals 40% HP
  • {First Aid Kit} - Revives Target & Heals 50% HP (out of combat only!)
  • {Balm} - Cures Bleed, Burn, & Acid
  • {Antidote} - Cures Poison
  • {Smelling Salts} - Revives Target & Cures Sleep
  • {Disinfectant} - Cures Infection
  • {Medication} - Cures most physical status effects
  • {Anxiety Meds} - Cures mental status effects & makes you immune to them (+ Sleep vulnerability)
  • {Stimulant} - Revives Target & Heals 50% HP + 50% STM
  • {Elixir} - Heals 100% HP + 100% STM
  • {Combat Surge} - "Increases power, grants extra attacks and protection from status effects, but increases all damage taken."
  • {Invulnerable Syringe} - "A shot that makes you nearly invulnerable for some time."
Items - Melee Weapons
Melee - Crushing Weapons:
  • {Broken Handle} "[Makeshift/Crush]" (+4 ATK)
  • {Bottle} "[Makeshift/Crush]" (+8 ATK)
  • {Broom} "[Makeshift/Crush]" (+8 ATK)
  • {Candlestick} "[Makeshift/Crush]" (+8 ATK)
  • {Metal Detector} "[Crush]" (+10 ATK)
  • {Nightstick} "[Crush]" (+12 ATK)
  • {Golf Club} "[Crush]" (+12 ATK)
  • {Baseball Bat} "[Crush]" (+14 ATK)
  • {Hammer} "[Crush]" (+14 ATK)
  • {Rolling Pin} "[Crush]" (+15 ATK)
  • {Frying Pan} "[Crush]" (+16 ATK)
  • {Metal Bat} "[Crush]" (+16 ATK)
  • {Mop} "[Crush]" (+18 ATK)
  • {Ernest's Metal Bat} "[Crush]" (+19 ATK)
  • {Hockey Stick} "[Crush]" (+20 ATK)
  • {Joyeuse} "[Makeshift/Crush]" (+24 ATK)
  • {Jawbone Club} "[Crush] A fleshy club made out of a deformed jaw. 15% chance to stun opponents." (+24 ATK)
  • {Sledgehammer} "[Crush]" (+30 ATK)
  • {Folding Chair} "[Crush]" (+32 ATK)

Melee - Slashing Weapons:
  • {Bread Knife} "[Slash]" (+5 ATK)
  • {Steak Knife} "[Slash]" (+6 ATK)
  • {Old Axe} "[Slash]" (+12 ATK)
  • {Kitchen Knife} "[Slash]" (+16 ATK)
  • {Chef's Knife} "[Slash]" (+20 ATK)
  • {Cleaver} "[Slash]" (+22 ATK)
  • {Machete} "[Slash]" (+24 ATK)
  • {Fireman's Axe} "[Slash]" (+26 ATK)
  • {Claymore} "[Slash] A large, medieval two-handed sword. A very sturdy weapon. Can survive breaking twice." (+30 ATK)
  • {Katana} "[Slash]" (+30 ATK)
  • {Combat Knife} "[Slash]" (+38 ATK)
  • {Scalpel} "[Slash]" (+42 ATK)
  • {Rat Tail Whip} "[Slash] A whip made from the entwined rat tails. Attack hits multiple foes, may cause disease." (+10 ATK)
  • {Misshapen Limb} "[Slash] A strange limb with claws and too many elbows. It attacks three times." (-4 ATK)
  • {Sewage Blade} "[Slash] Mystical blade of crystalized refuse. Deals acid damage, and may reduce target's defenses." (+28 ATK)
  • {Chainsaw} "[Slash] Gasoline-powered. Unwieldy, but cause catastrophic wounds." Loaded w/ {Gasoline}. Must be empty to load. (+80 ATK)
  • {Hellsword} "[Slash] A heartbeat thrums against your hand. Deals Corruption damage. Reduces your max HP and STAM." (+80 ATK, +8 AGI, -60 Max HP, -20 Max STM)

Melee - Piercing Weapons:
  • {Carving Fork} "[Pierce]" (+6 ATK)
  • {Rake} "[Makeshift/Pierce]" (+7 ATK)
  • {Pool Cue} "[Pierce]" (+12 ATK)
  • {Rat Claws} "[Pierce] Gnarled rat claws you can use as weapons. Attacks twice. May cause bleeding." (+12 ATK)
  • {Dagger} "[Pierce]" (+16 ATK)
  • {Venom Dagger} "[Pierce]" (+16 ATK)
  • {Mosquito Knife} "[Pierce] A blood-drinking dagger." (+16 ATK)
  • {Rapier} "[Pierce]" (+20 ATK)
  • {Spade} "[Pierce]" (+26 ATK)
  • {Patchwork Club} "[Pierce] A lump of wriggly stitched flesh fashioned into a club. 30% chance to perform counterattacks." (+26 ATK)
  • {Pitchfork} "[Pierce]" (+32 ATK)
  • {Spear} "[Pierce]" (+32 ATK)

Melee - Special Weapons:
  • {Mace} "[Crush/Pierce] An antique spiked mace. Very strong. Can survive 2 breaks." (+24 ATK)
  • {Stun Baton} "[Shock] Battery-powered. Delivers an electric shock that stuns enemies." Loaded w/ {Batteries}. Must be empty to load. (+32 ATK)
  • {Cattle Prod Spear} "[Shock] Battery-powered. Delivers an electric shock that can paralyze foes." Loaded w/ {Batteries}. Must be empty to load. (+60 ATK)
  • {Furnace Edge} "[Fire] A white-hot blade pulled out of the heart of the furnace beast." (+42 ATK)
Items - Ranged Weapons & Ammo
Gear - Ranged Weapons:
  • {SMG} "A submachine gun." (+24 BLS) Loaded w/ {SMG Bullet}.
  • {SMG Special} "A submachine gun." (+32 BLS) Loaded w/ {SMG Bullet}.
  • {Pistol} "A small caliber handgun." (+32 BLS) Loaded w/ {Pistol Bullet}.
  • {Custom Handgun} "A small caliber handgun." (+40 BLS) Loaded w/ {Pistol Bullet}.
  • {Magnum} "A magnum revolver." (+50 BLS) Loaded w/ {Magnum Bullet}.
  • {Silver Magnum} "A magnum revolver." (+64 BLS) Loaded w/ {Magnum Bullet}.
  • {Chill Touch} "Customized paintball gun covered in mysterious arcane symbols..." (+12 ATK, +24 BLS, -4 AGI) Loaded w/ {Paintball}.
  • {Old Rifle} "An old hunting rifle." (+12 ATK, +58 BLS, -4 AGI) Loaded w/ {Rifle Bullet}.
  • {War Rifle} "An old rifle used in the war." (+12 ATK, +72 BLS, -4 AGI) Loaded w/ {Rifle Bullet}.
  • {Hunting Shotgun} "An antique hunting shotgun. Single barrel, pump-action." (+12 ATK, +64 BLS, -4 AGI) Loaded w/ {Shotgun Shell}.
  • {Shotgun} "A double-barreled shotgun." (+8 ATK, +74 BLS, -4 AGI) Loaded w/ {Shotgun Shell}.
  • {High-Caliber Rifle} "A high-caliber rifle capable of burst fire. It has a bayonet." (+16 ATK, +52 BLS, -4 AGI) Loaded w/ {High Caliber Bullets}.
  • {Gatling Gun} "A high-caliber, belt-fed machinegun." (+20 ATK, +80 BLS, -8 AGI) Loaded w/ {Ammo Belt}.
  • {Crossbow} "A projectile weapon that fires bolts." (+8 ATK, +40 BLS) Loaded w/ multiple different {Bolt} types.
  • {Acid Sprayer} (+40 BLS)
  • {Flamethrower} (+48 BLS)
  • {Slingshot} "A projectile weapon that fires marbles." (+20 BLS) Loaded w/ {Marble}. Equippable by Sophie & Joel.
  • {Super Slingshot} "A projectile weapon that fires marbles." (+30 BLS) Loaded w/ {Marble}. Equippable by Sophie & Joel.

Items - Ammo:
  • {Pistol Bullet} "Low caliber bullet for a handgun."
  • {Magnum Bullet} "Magnum revolver bullet."
  • {SMG Bullet} "Small caliber bullet for an SMG."
  • {Rifle Bullet} "Bullet for a hunting rifle."
  • {Shotgun Shell} "Buckshot shell for a shotgun."
  • {High Caliber Bullets} "Bullet for a high caliber rifle."
  • {Ammo Belt} "Ammo belt for a belt-fed Gatling gun."
  • {Standard Bolt} "Projectile for a crossbow."
  • {Flame Bolt} "Incendiary projectile for a crossbow."
  • {Acid Bolt} "Acid projectile for a crossbow."
  • {Explosive Bolt} "Explosive projectile for a crossbow."
  • {Special Bolt} "Strange projectile for a crossbow."
  • {Paintball} "Tiny capsules filled with something foul. Monty makes these."
  • {Marble} "Can be used as ammo with a slingshot."
Items - Gear - Armor & Accessories
Gear - Head:
  • {Baseball Cap} "The baseball cap of a team you don't like." (+2 AGI)
  • {Beret} "Helps to keep your thoughts together. Helps resist Charm, Confusion, Panic and Rage."
  • {Blood Cap} "Cursed helmet gives you great power, but drains your life over time." (+4 ATK/BLS +2 DEF/BDF/AGI, +40 Max HP, +10 Max STM)
  • {Cowboy Hat} "Yeehaw." (+1 ATK, +2 BLS)
  • {Cowboy Hat} "Yeeeeehaw! A lucky hat!" (+2 DEF, +10 LUK) Only Sam can equip this!
  • {Cowboy Hat?} "Yeeeeehaw! A lucky hat?" (No Stats) Only Sam can equip this!
  • {Not a Cowboy Hat} "This fake cowboy hat won't come off your head. It makes you immune to poison." (No Stats) Only Sam can equip this!
  • {Football Helmet} "Protective headgear for football. Protects you from crushing damage and stun." (+4 ATK, +6 DEF, -2 AGI)
  • {Gas Mask} "Protects from poison and sleep attacks, and grants some protection from acid fumes."
  • {Giant Rat Skull} "The misshapen skull of a monstrous rat." (+4 DEF +2 BDF/AGI/LUK)
  • {Hard Hat} "Protective headgear for work environments. High protection from crushing damage and stun." (+3 DEF)
  • {Headphones} "A pair of noise-cancelling headphones. Grants 50% resist to panic, charm, confusion and rage."
  • {Motorcycle Helmet} "Heavy helmet, grants high protection and an agility boost at the cost of accuracy. Protects from stun." (+2 ATK, +8 DEF, +4 AGI)
  • {Patchwork Hat} " hat made from warm, wriggly bits of leather. Increases max HP and grants 25% bleeding resistance." (+2 DEF/BDF, +25 Max HP)
  • {Pickelhaube} "Ostentatious helmet that attracts the attention of enemies." (+6 DEF, +4 BLS, -2 AGI)
  • {Rusty Crown} "Rusty old crown that was worn by a grotesque rat monster. You hear squeaking in your head..." (+2 ATK, +1 DEF, +1 BDF) Makes all rats friendly & chatty!
  • {Trilby} "Not quite as stylish as it used to be." (+2 DEF, +3 BLS, +4 LUK)

Gear - Body:
  • {Breastplate} "An authentic Medieval breastplate. Extremely tough, but the metal is quite cold. Resists piercing." (+28 DEF, +12 BDF, -8 AGI)
  • {Denim Vest} (+4 DEF, +2 BDF, +1 AGI)
  • {Flak Jacket} "This flak jacket can even protect from bullets. Resists Bullet damage." (+20 DEF, +18 BDF, -4 AGI)
  • {Hoodie} (+4 DEF)
  • {Leather Vest} (+2 ATK/BDF/AGI, +8 DEF)
  • {Mackinaw Jacket} (+4 ATK/DEF, +1 AGI, +2 LUK)
  • {Monty's Jacket} (+4 ATK/BDF, +6 DEF)
  • {Old Uniform} (+4 DEF/BDF/LUK, +2 AGI)
  • {Padded Jacket} (+10 DEF, +3 BDF, -3 AGI)
  • {Patchwork Jacket} "Jacket made from warm, wriggly bits of leather. Increases max HP and grants 50% bleeding resistance." (+4 DEF/BDF, +50 Max HP)
  • {Polo Shirt} (+2 DEF)
  • {Rags} (+1 DEF)
  • {Studded Jacket} (+6 ATK, +16 DEF, +8 BDF, +2 AGI)
  • {T-Shirt} (+1 DEF, +5 AGI)
  • {Tank Top} (+3 ATK)
  • {Vampiric Jacket} "Cursed armor gives you great power, but drains your life over time." (+10 ATK/BLS, +6 DEF/BDF/AGI, +100 Max HP, +20 Max STM)
  • {Windbreaker Jacket} (+5 DEF, +2 AGI)
  • {Winter Coat} (+12 DEF, +1 BDF, -4 AGI)
  • {Coat of Arms} "A suit made from tangled limbs. 50% chance for the wearer to act twice per turn." (-2 ATK/DEF/BLS/BDF -8 AGI)

Gear - Feet:
  • {Army Boots} (+4 BDF +4 AGI)
  • {Patchwork Boots} "Boots made from warm, wriggly bits of leather. Increases max HP and grants 25% bleeding resistance." (+4 AGI)
  • {Rubber Boots} "Protects from acid damage and from dangerous fluids on the floor. Grants Kick ability."
  • {Running Shoes} (+8 AGI)
  • {Vintage Sneakers} (+4 AGI +2 LUK)
  • {Work Boots} (+6 DEF +3 AGI)

Gear - Accessories:
  • {Glasses} "Increases accuracy, but reduces critical hit rate."
  • {Gloves} "Improves your grip with firearms." (+4 BLS)
  • {Mycelium Cloak} "A damp, fibrous cloak of mycelium. Protects from Stun and Paralysis." (+4 AGI)
  • {Needle Gloves} "The fingers are tipped with long needles. Grants a bleed effect to all regular attacks."
  • {Plastic Gloves} "Grants limited protection from acid, poison and infections."
  • {Rat Tail Belt} "A giant rat's tail tied around the waist like a belt. Boosts luck and agility." (+4 AGI, +2 LUK)
  • {Tie} "Lucky tie. Resists status effects." (+3 LUK)
  • {Trauma Kit} "Gives combat-only skill 'Staunch Wounds'." (-4 AGI)

Gear - Jewelry:
  • {Asbestos Amulet} "Protects from fire and burns."
  • {Carnelian Ring} "Grants immunity to bleeding and increases max HP." (+20 Max HP)
  • {Copper Bangle} "A bangle of engraved copper. Boosts wearer's agility." (+4 AGI)
  • {Crimson Ring} "Cursed ring that grants life regeneration."
  • {Emerald Ring} "Strange, green ring. Bolsters your STM, and protects from Acid damage." (+50 Max STM)
  • {Eye Amulet} "Grants immunity to blindness and increases critical hit rate."
  • {Golden Locket} "A valuable-looking golden locket. Feels like a lucky charm. Increases Crushing damage resist." (+8 LUK)
  • {Jade Earrings} "A pair of valuable-looking jade earrings. Increases piercing damage resist."
  • {Lapis Band} "Grants immunity to poison and increases defense."
  • {Odd Necklace} "Strange necklace. It feels very cold to touch. You have a bad feeling about it." Boosts critical hit rate, but increases damage taken.
  • {Ring of Alertness} "Grants immunity to sleep and increases evasion."
  • {Ring of Purity} "Grants immunity to infection, and increases STM." (+5 Max STM)
  • {Ruby Ring} "Strange, red ring. Bolsters your HP, and protects from fire damage." (+100 Max HP)
  • {Sapphire Ring} "Strange, blue ring. Bolsters both HP and STM, and protects from Cold damage." (+50 Max HP, +25 Max STM)
  • {Teeth Pendant} "A little charm made from bits, bobs and a few teeth." (+12 ATK, +4 AGI, -20 Max HP, -10 Max STM/DEF/BDF)
Items - Key Items - Discs & Offerings
Key Items - All Discs:
Note: [Square brackets] denote # of moons value for door puzzles.
  • {Negative Disc} [-10] The {Void Disc} turns into this by turning the 3F Apt #31 bedroom lights off, then imprinting the telescope image onto it.
  • {Void Disc} [-1] Found on 3F, in Apt #31 inside bedroom with the telescope.
  • {Mercury Disc} [0] Found on 3F, in the frozen apartment just past the Pompom boss.
  • {Venus Disc} [0] Found on the GF women's bathroom (requires {Herbicide})
  • {Earth Disc} [1] Found on 1F, in the Mouth monster room (must feed it first)
  • {Mars Disc} [2] Found on 1F, in the Rat Freak room (needs {Earth Disc} to open)
  • {Pluto Disc} [5] Found on 3F, in Apt #31 inside bedroom /w telescope.
  • {Sun Disc} [13] Found in the GF Mail Room (past the crashed bus)
  • {Neptune Disc} [16] Found in the B1 mushroom area.
  • {Uranus Disc} [28] Found on the GF in Mutt's Fish and Chips bathroom.
  • {Jupiter Disc} [95] Found on the GF, in the Landlord's apartment, once it's fully mutated (after fully paying rent) in the maze of tunnels.
  • {Saturn Disc} [146] Found on the GF Mail Room just past the Saturn door.
All Disc Puzzle Solutions:
[F1 Apt 11 Door]: Earth [1]
[GF Stairwell Door]: Earth [1] & Mars [2] = 3
[GF Office Door] (next to Jasper): The 1st door is Earth [1] & Uranus [28] = 29, then the 2nd door is Mars [2] & Sun [13] = 15
[GF Mail Room] (north of Mutt): Jupiter [95], Uranus [28], Neptune [16], Pluto [5], Mars [2] = 146
[B1 Security Room] (1st hallway): The 1st door is Neptune [16] & Mars [2] = 18, then Sun [13] & Pluto [5] = 18. For the extra side door after the 1st door, use Uranus [28] & Negative [-10] = 18.
[B1 Storage 1] (next to Steve): Neptune [16]
[B1 Storage 2] (farthest from Steve): Pluto [5]
[F1 Planetarium]: Starting from the center: Sun, Mercury, Venus, Earth, Mars, Jupiter, Saturn, Uranus, & Neptune

Key Items - All Offerings Accepted by the Astronomers:
  • Aurelius Offerings
  • {Painting} [correct] When you leave the darkened room in Frederic's Apartment, the painting you touched should be wet and stain your hands with BLUE paint specifically. Store it in the {Canvas Carry Bag} from Frederic.
  • {Painting} [wrong] Any other Painting picked up and placed in the {Canvas Carry Bag}.
  • {Canvas Carry Bag} [wrong]
  • {Wrapped Painting} [cursed] Found in B1 Pit. Head south of the B1 Parking Garage and to the left of Stuart to find a hole you can jump down to find Charan. He will leave on Day 8, so you'll need to be quick!

    Give him the {Rose} received from befriending the Shadow, and he'll leave the next day. Jump down the hole to find the painting at the end, guarded by a powerful Shade.


  • Jasper Offerings
  • {Loose Manuscript} [correct] Get it from defeating the Typewrither boss on the 2nd Floor (F2) after fixing the elevator, then combine it with the page in the typewriter in the same apartment, or it won't work.
  • {Crumpled Manuscript} [wrong]
  • {Clean Manuscript} [wrong]
  • {Last Will} [cursed] Find the {Unlabeled Cartridge} behind the 2 locked Disc doors near Jasper (Ground Floor), then play it in Spine's Room (i.e. turn the lights off in Apt 31, then go to the corrupted version of your living room). Navigate the "Glitch World" to find it near the end.

  • Beryl Offerings
  • {CCTV Recording} [correct] Whichever one turns the {Guinea Pig} into a monster when you change feeds in the Basement (B1) Security Room. Note: you CANNOT get this without sacrificing the {Guinea Pig}. "Equal Sign" Door Puzzle solutions: Neptune [16] + Mars [2] == Sun [13] + Pluto [5] OR numerous combinations of Mercury [0], Venus [0], Earth [1], Mars [2], & Void [-1] (does not work if Void [-1] has become Negative [-10])
  • {CCTV Recording} [wrong] All other recordings from the Basement (B1) Security Room.
  • {Blank VHS Tape} [wrong]
  • {Old Tape} [cursed] Found on F4. Must play the "Elevator Game" to get there. The hint for this is found written inside Marshall's stall in the GF Men's Bathroom after Rafta & Nestor unite.

    The code is 0-3-1-2; that is, use the elevator to go to the Ground Floor, then F3, F1, and finally F2 to have F4 show up as a new elevator button. Navigate the "Metro" area to find the tape at the end.


  • Aster Offerings
  • {Photograph} [correct] Photo of the Visitor from the telescope with the {Negative Disc}, developed by Lyle (or yourself, if Lyle/Shutterbug is dead)
  • {Photograph} [wrong] You can make a photo of any of the other discs, which doesn't work.
  • {Photo Paper} [wrong]
  • {Old Photograph} [cursed] Found in the Landlord's Apartment on the Ground Floor. There's a hidden wall at the very top of the {Wraithscourge} room that can be blown up with a {Sapper Charge}. The photograph is behind it, guarded by a powerful Shade.

  • Universal Offerings (any astronomer will accept)
  • {Guinea Pig} [wrong, kind of] Causes the XIN-AMON endings (get it? Cinnamon?). It's also used to get the correct {CCTV Recording} in the Basement (B1). Do not give it to the Shadow, or you'll get locked out of some endings.
Items - Special Shops & Trading
Mutt's Fish and Chips Shop - Special Inventory - Ground Floor (GF)
These are "one-of-a-kind offers" that increase in price by 25% for every other item you buy.

This is calculated based on compounding interest, so an item costing [$100] becomes [$125] then [$156] then [$196], and so on! This can get out of hand pretty quickly, so buy the baseline expensive items first if you can.

The prices here are the baseline cost without any of the adjusted prices, and Mutt will continue to have new inventory every day until the final day.
  • {Auntie Wilma's Crossword Challenge} [$80] "...a hardcore crossword video game. For experts only."
  • {Breastplate} [$100] "A medieval breastplate made with modern steel. Cumbersome, but highly protective." (+28 DEF, +12 BDF, -8 AGI)
  • {Cattle Prod Spear} [$200] "A powerful two-pronged skewer that uses batteries to deliver a powerful discharge. May paralyze enemies on hit." (+60 ATK)
  • {Chainsaw} [$200] "Cuts through monsters like butter. You need a supply of gasoline to keep it working." (+80 ATK)
  • {Champion's Belt} [$200] "It gives a small increase to HP and STM, and also boosts all stats." (All Stats +2, +20% HP, +20% STM)
  • {Coffee Machine} [$200] "Will produce 4 cups of coffee in your home every morning."
  • {Comfort Belt} [$50] "A comfortable belt. Halves max HP, but doubles max STM."
  • {Crossbow} [$40] "It uses bolts as munitions. It's powerful, but needs to be loaded in between every shot. The purchase comes with 12 bolts. Speak to me to buy more bolts, including special explosive bolts."
  • {Lockpicks} [$50] "Reusable, and will open most simple locks."
  • {Pickelhaube} [$60] "A highly decorated pickelhaube helmet. Ostentatious headgear that provides protection, but also attracts attention from foes. Ideal to have a stronger ally take hits on your behalf." (+6 DEF, +4 BLS, -2 AGI)
  • {Stun Baton} [$30] "Battery-powered. Delivers an electric shock that can stun, even paralyze sometimes." (+32 ATK)
  • {Training Belt} [$40] "A special belt. It doubles the wearer's max HP, but halves max STM."
  • {Trauma Kit} [$80] "An accessory that grants the ability to heal wounds in battle. More effective for treating heavy wounds, but performs poorly with light wounds."
  • {Trophy} [$200] "Will make you feel like a winner at home." Always appears last on day 14 (1 day left). Provides the "With your sweat and tears" achievement!
  • {Venom Dagger} [$30] "A dagger coated in deadly poison. Very high likelihood to infect those you attack."


Trading with Emmanuel (Cassette Tapes) - Ground Floor (GF)
Found in the bottom left corner inside Mutt's Fish and Chips on the Ground Floor.
  • {Fingernail Bomb} (1 tape) - "Strange explosive that projects keratinous shrapnel. 80 piercing damage to all enemies, may cause Bleed."
  • {Misshapen Limb} (2 tapes) - "[Slash] A strange limb with claws and too many elbows. It attacks three times."
  • {Elbow Pads} (3 tapes) - "Protective pads used in various sports."
  • {Crown of Fingers} (4 tapes) - "Disquieting crown of wriggling fingers. Normal attacks gain 30% to inflict confusion."
  • {Coat of Arms} (6 tapes) - "A suit made from tangled limbs. 50% chance for the wearer to act twice per turn."


Trading with Clara the Cheese Rat - 1st Floor (F1)
Found in the F1 "Rat Lair" Apartment (See the "Simplified F1 Map" in the "Maps" section). Must be wearing the {Rusty Crown} from the Rat King to speak to them.
  • 2x {Cheese Wedge} ($20) - "A pungent wedge of very sharp cheese. Recovers 32 HP, 16 STM. Somewhat filling." Available for sale once a day.
Very useful for Ernest's "Feed the Colonel" Skill!


Trading with the Secret Rat Shop - 1st Floor (F1)
Found on F1 in Rafta's Apt (See the "Simplified F1 Map" in the "Maps" section). Must be wearing the {Rusty Crown} from the Rat King to speak to them. You also must also have intentionally avoided killing all of the Rats on the way out to the rest of the F1 hallways.
  • {Elixir} ($10)
  • {Cheez-Stix} ($10)
  • {Cheese Pizza} ($20)
  • {Stale Pizza} ($25)
  • {Rotten Pizza} ($30)
  • {Grenade} ($10)
  • {Junk} ($20)
  • {Sewage Blade} ($100)


Trading with the Rat Hole (Rat Tails) - 1st Floor (F1)
Found in the F1 "Rat Hole Hallway" next to the Lost Letter to Jasper (See the "Simplified F1 Map" in the "Maps" section) There's a hidden path in the middle of that hallway that leads to the east.
  • {Filth Bomb} (1 tail) - "Explosive that sprays toxic filth. 20 acid damage to all enemies, and may cause Poison and Disease."
  • {Rat Tail Whip} (2 tails) - "[Slash] A whip made from the entwined rat tails. Attack hits multiple foes, may cause disease."
  • {Rat Tail Belt} (3 tails) - "A giant rat's tail tied around the waist like a belt. Boost luck and agility."
  • {Giant Rat Skull} (4 tails) - "The misshapen skull of a monstrous rat."
  • {Filthy Ring} (6 tails) - "A disgusting, greasy, cursed ring. Grants disease affinity: ailments grant you power."

If you're still having trouble navigating F1, you can find the location of both Clara and the Rat Hole from this video, as well as the Secret Rat Shop and all Rat Interactions with the {Rusty Crown}:


Trading with Tickle (Friendship Points) - Basement (B1)
Found just north of the giant Furnace in the Flooded Basement.
  • {Bloodclot Bomb} (1 pt) - "Inflicts heavy Bleeding on all targets."
  • {Mosquito Knife} (2 pts) - "[Pierce] A blood-drinking dagger."
  • {Blood Helmet} (4 pts) - "Cursed helmet gives you great power, but drains your life over time."
  • {Vampiric Jacket} (6 pts) - "Cursed armor gives you great power, but drains your life over time."
  • {Crimson Ring} (10 pts) - "Cursed ring that grants life regeneration."
When you're done trading with Tickle, you can suggest "feed on me instead" to remove him from the Furnace Arm, so that you can fight the Furnace Superboss (i.e. a way to remove with Tickle without having to kill him)

This will "recruit" him by nesting on the Main Character and lower your stats (-30% Max HP, -30% Max STM, -20% ATK) but also provide you with unique and supportive Tickle Skills, turning you into a psuedo-"Blood Cleric" class!
Items - Special Shops & Trading 2
Trading with Stuart - Parking Garage (B1)
Found in a side room on the south side of the B1 Parking Garage. Doesn't do much UNLESS you have Audrey with you. Since he was a mechanic, he'll get excited about the prospect of a walking (but not talking) vending machine!

Afterwards, he'll now be available as a standard Buy & Sell Shop to your crew! He has some useful odds and ends (and duct tape!) but the main attraction is the new Audrey equipment now for sale.
  • {Quad Wheels} ($100) - "Feet slot item for machines. Boosts agility and unlocks Reckless Driving."
  • {Spiked Bumper} ($100) - "Increases attack damage, and counters physical attacks."
  • {Cooler Unit} ($200) - "Keeps the drinks ice cold. Unlocks Ice Cold Can attack and Refreshments."
  • {Coffee Unit} ($200) - "A coffee maker inserted into the chassis. Unlocks Burning Shot attack and Hot Drinks."
  • {Carbonator} ($200) - "A shot of carbon dioxide to make drinks extra fizzy. Unlocks Explosive Shot and Fizzy Drinks."


Trading with Kevin (Worm Egg) - Rafta's Apt (F1)
Follow all the steps for the Nestor & Rafta Quest until Nestor meets up with Rafta. Afterwards, leave Nestor's Body alone for a few days, do NOT attack it. Kevin will eventually show up near Nestor's Body!
  • {Worm Juice} (1 egg) - "Foul-smelling juice. Attracts enemy attacks toward user for 4-6 turns. Only usable in combat."
  • {Worm-Baked Pie} (2 eggs) - "Did a worm bake this pie? Restores at least 80 HP and STM to the whole party."
  • {Worm O' Nine Tails} (3 eggs) - "[Slash] Whip made from the entwined worms. Hits multiple foes. More effective against charmed foes."
  • {Wormskin Robe} (5 eggs) - "A robe made out of worms weaved together like fabric. Boosts attack and makes the wearer immune to charm."
  • {Worm Crown} (6 eggs) - "Grants a chance for normal attacks to cause charm. Also boosts attack."
Misc Notes 1 - Maps & Hidden Stats
Here you can find everything I couldn't sort into another section properly, for now. New findings may go here until they're placed into a relevant section!

All Maps
https://imgur.com/a/wt7eUr0 (v1.0 maps only)
From this thread by Gravity Eater: https://steamcommunity.yuanyoumao.com/app/3373660/discussions/0/594018634646501846/

Simplified F1 Map

Open image in a new tab and zoom in for best resolution

The main trick to the 1st Floor being confusing is the "To A" connected hallways in the map above. There's 4 horizonal hallways but it "feels" like 3 horizontal hallways because of that, and screws with your mental map. The "Rat Hole" hallway is also connected what feels like vertically, but it drops you off at completely different parts of the map, leading to even more confusion!

Cursed (Hard) Mode Exclusive: The above map still applies, HOWEVER, there is an additional set of dead ends thrown in on Cursed Mode. If you encounter a dead end, then you'll be stuck unless you find a way out to the "regular" map.


Known Hidden Stats & Effects
Social/Loneliness Statuses:
"Being lonely reduces your evasion, and sometimes makes you fail to attack. What if they're a friend...? To manage loneliness, try to find some friends and speak to them. Looking at social media can also help a little bit to feel less alone..."
"You feel much less lonely."
"You feel kind of lonely." Triggers Lonely (Lowered Evasion, "Attack" replaced with "...Attack?")
"You feel isolated."
"You feel completely alone."


Calmness/Tranquility Statuses:
"Being anxious reduces the XP you gain. So much weighs on your mind, you just can't focus. To manage stress, you need to go back home and relax. Playing some video games could help."
"You feel relaxed."
"You feel stressed." Triggers Listless (-50% XP Gained, Lower Hit Rate, Lower Crit Rate)
"You feel anxious."
"You feel very paranoid."


Energy/Vigor Statuses:
"Exhaustion halves your max stamina, reduces your speed, evasion, and eats away at your stamina over time! You really need to get some rest, and fast!"
"You no longer feel tired."
"You feel a bit drowsy." Triggers Tired (-25% Max STM)
"You feel tired."
"You feel exhausted." Triggers Exhausted (-50% Max STM, -25% AGI, Lower Evasion)


Hunger/Food Statuses:
"This halves your max health, reduces your attack damage, and eats away at your health over time. You need to eat!"
"You no longer feel hungry."
"You feel a little hungry."
"You feel hungry." Triggers Hungry (-25% Max HP)
"You're starving." Triggers Starving (-50% Max HP, -25% ATK, -25% BLS)


Hygiene/Cleanliness Statuses:
"Smelliness reduces luck, makes you more vulnerable to ailments, and enemies will not detect you from further away! To manage hygiene, shower and brush your teeth at home. Some mint gum can help in a pinch, but it can only do so much..."
"You no longer feel grimy."
"You feel a bit disheveled." Triggers Smelly (-50% LUK, More susceptible to Status Effects, +Aggro Range)
"You feel grimy."
"You feel disgusting."


Morale/Productivity Statuses:
"Depression increases all damage taken! To manager your morale, you need to improve your overall state and make progress exploring. Small victories like beating video games can help in the short term."
"You no longer feel useless."
"You feel unproductive." Triggers Depressed (+50% All Damage Taken)
"You feel useless."
"You feel utterly worthless."


Overall Statuses (Combination of the above):
"You feel much better."
"You feel unwell."
"You feel despair."
"You feel on the verge of a breakdown."
Misc Notes 2 - Rare Drops, etc.
Notable Rare Item Drops
These are items that have a small drop chance (i.e. NOT guaranteed) from certain enemies. I wanted to note these down since there are some VERY powerful items worth reloading your game to retry getting them.

[F2]:
Eyecluster (Lyle's Apt Bathroom): {Eye Amulet}

[F1]:
Mouth Rat, Giant Rat, & Rat Guardian: {Rat Tail Belt} & {Giant Rat Skull}
Teeth Rat & Eye Rat: {Rat Tail Belt}
Tail Rat: {Rat Tail Belt} & {Rat Tail Whip}
Rat Freak: {Filthy Ring}, {Rat Claws}, & {Sewage Blade}
Rat King: {Filthy Ring}


[GF]:
Bayonet, Trench Digger: {Army Helmet} & {Army Jacket}
Main Gauche, Touchy, Feely: {Floral Shirt}


[B1]:
Crawler (Stairwell): {Coat of Arms} (!!!)
Antoine (IT Room): {Yanma Belt} & {Scarlet Scarf} (!!!)
Enforcer (Flooded Zone): {Chest Guard} & {Hockey Helmet}
Guardian (Fungus Lair): {Shroom Cap Shield}


Events Triggered By Specific Day
These are important events triggered explicitly by what is the CURRENT DAY (i.e. NO other triggers)
  • Day 1 (15 days left)
    The game begins

  • Day 2 (14 days left)
    Apt 32 - The door opens (Teeth Family's home)

  • Day 3 (13 days left)
    Apt 31 - The door opens (Edwin/Stargazer's home)

  • Day 4 (12 days left)
    Apt 32 - The apartment begins to mutate (door, floor, & walls change)
    Apt 38 - The door is unlocked (Louis, Kaeley, Charlie, & Pierre's home)

  • Day 5 (11 days left)
    Apt 32 - Mutated Teeth Door appears; Joel, Clint, Ben, & Madison all mutate into their 2nd forms. You can no longer recruit Joel if you haven't already!
    Apt 30 - The door opens (Taxidermy)

  • Day 6 (10 days left)
    Apt 32 - The Teeth Door shuts and cannot be opened

  • Day 7 (9 days left)
    Nothing

  • Day 8 (8 days left)
    An "earthquake" occurs and shakes your screen Charan leaves the building

  • Day 9 (7 days left)
    Apt 32 - The Teeth Door opens for Teeth Hell! Joel, Clint, Ben, Madison, & Rosie (Baby Teeth) all mutate into their 3rd and final forms. Notable Item Drops: {Toothy Whip} (Joel), {Tooth Knife} (Clint), {Tooth Hammer} (Madison), {Tooth Rifle} & {Tooth Scimitar} (Rosie/Baby Teeth)
    Apt 38 - Charlie (Hive Man) becomes fully mutated.
    Apt 18 - Marvin (Plant Man) becomes fully mutated. Notable Item Drops: {Invulnerable Syringe}

  • Day 10 (6 days left)
    Nothing

  • Day 11 (5 days left)
    Nothing

  • Day 12 (4 days left)
    Nothing

  • Day 13 (3 days left)
    Nothing

  • Day 14 (2 days left)
    Nothing

  • Day 15 (1 day left)
    Trying to go to sleep will now show a "last chance to wrap things up" warning.

  • Day 16 (0 days left)
    Sybil is now gone, and leaving your apartment triggers the "No Going Back" Ending!


All Locked Simple Key Contents
Either a {Simple Key} (single use) OR the {Lockpicks} are required to open these:

[F3 Apt 32 Safe]: {Old Rifle} & 12x {Rifle Bullets}
[F3 Apt 31 Safe]: [~$320] & {Gold Locket}
[F3 Apt 37 Door]: Eye Monsters, Some Healing Items, {Clogs}, {Cloth}, {Machete}
[F3 Apt 38 Kaeley's Room] (there are 12 locks in total; Kaeley will become hostile if you use the {Lockpicks} to cheat 3 times): {Snake Whip}, 4x {Wrapped Gift}, {Pitchfork}, {Grenade}, {Shuriken}, Various Ammo, Various Healing Items
[F2 Lyle's Apt Safe]: [~$200] & {Jade Earrings}
[F2 Eugene's Safe]: [~$120] & {Ruby Ring}
[F1 Fred's Apt Safe]: [~$200] & {Silver Bracelet}
[F1 Jungle Apt Safe]: [~$100] & {Stamp Collection}
[GF Landlord's Apt Safe]: [~$250]
[B1 Steve's Room Door]: {Lapis Band}, Some Healing Items


Audrey Equipment (Machine Parts)
Audrey can be a little underwhelming compared to other party members, unless you start kitting her out with some machine-specific equipment. Here's a list of what she can get and where to get it (most of these are MISSABLE!)
  • {Chrome Finish} - "Shiny chrome finish. Minimal protection, but quite stylish. Attracts enemy attacks..." (Dropped by Cop Car)
  • {Chobham Armor} - "Heavy plates of composite armor used on tanks. Resists Bullet and Explosive damage." (Dropped by SWAT Truck)
  • {Demon Plating} - "Fleshy plating hardened in hellfire... Boosts physical Attack and protects from Fire." (Dropped by Hellride)
  • {Fungus Fibers} - "Porous plates of fungus. Increases Stamina and resists Crushing damage, but vulnerable to Fire." (Dropped by Guardian)
  • {Rhinoceros Hide} - "Skin of thick, gray leather, held in place with hooks. Boosts max HP and Bleed resist." (Dropped by Suture Wire)
  • {Tank Tracks} - "Boosts defense and ballistics. Unlocks ground anchor." (Dropped by APC)
  • {Tank Gun} - "Heavy artillery that gives a huge boost to Ballistics, improving can launching attacks." (Dropped by Grave Digger)
  • {Quad Wheels} - "Feet slot item for machines. Boosts agility and unlocks Reckless Driving." (Buy from Stuart for $100)
  • {Spiked Bumper} - "Increases attack damage, and counters physical attacks." (Buy from Stuart for $100)
  • {Cooler Unit} - "Keeps the drinks ice cold. Unlocks Ice Cold Can attack and Refreshments." (Buy from Stuart for $200)
  • {Coffee Unit} - "A coffee maker inserted into the chassis. Unlocks Burning Shot attack and Hot Drinks." (Buy from Stuart for $200)
  • {Carbonator} - "A shot of carbon dioxide to make drinks extra fizzy. Unlocks Explosive Shot and Fizzy Drinks." (Buy from Stuart $200)
Video Walkthroughs, Showcases, etc.
Here are all of the videos I've made thus far for Look Outside, including the ones I haven't fit elsewhere yet. Check 'em out!


Videos from v1.0 to v1.3


Videos from v1.4


Videos from v1.5 to v1.7


Videos from v2.0


Videos from v2.1 onwards


Easter Eggs & References
Gameplay 1: If your Left Arm (Ranged Weapons) is Gnawed Off, you can still equip the {Crossbow}! It is heavily implied that your Main Character has attached it to their Gnawed Off Arm, and using their other to aim and load it. This is also probably related to the next Easter Egg...

Gameplay 2: Speaking of using weapons with mangled appendages, if your main character's name contains "Ash", "Williams", or "EvilDead" (case sensitivity doesn't matter), then you'll unlock some sweet Easter Egg bonuses!

If your Right Arm (Melee Weapons) is Gnawed Off, you can still equip ALL {Shotguns}! (this is normally a 2-handed requirement)

If your Left Arm (Ranged Weapons) is Gnawed Off, you can still equip THE {Chainsaw}! (this is normally a 2-handed requirement)

Good, Bad, I'm The Guy With A Gun... (and a Chainsaw)

Note: this ALSO works if your Operating System's username has "Ash", "Williams", or "EvilDead", but good luck changing that easily on Windows...


Gameplay 3: You can also name your Main Character something that contains the word "Lumpy" for special bonus! This causes Sybil to say "What kind of name is that?" and "Also, what's with the weird jacket?"

This enables "Lumpy Mode", which puts you in a {Straitjacket} right from the start that you CANNOT take off under any circumstances!

This grants +2 to all stats and "Keeps yourself together. Immune to Panic, Rage, Confusion and Charm. Grants the skill Dire Straits." You also CANNOT equip Melee or Ranged weapons anymore!

This is an homage to LumpyTouch, a friend and collaborator of the developer, and fellow pixel artist!


Characters & Inspirations 1: Xaria & Montgomery are inspired by a duo from Baldur's Gate, Xzar & Montaron. Xaria's starting ranged weapon "Chill Touch" is also named after one of Xzar's spells! (from the official developer stream)

Characters & Inspirations 2: The sheer number of recruitable characters are also inspired by Baldur's Gate, in that you wander around and stumble upon a multitude of potential party members! (from the official developer stream)

Characters & Inspirations 3: Hellen is also a recruitable character in Malison: the Cursed City by the same developer (not yet released! from the official developer stream)

Characters & Inspirations 4: Probably the biggest inspiration for Look Outside was the Famicom game Sweet Home ( https://en.wikipedia.org/wiki/Sweet_Home_(video_game) ) which also has been considered as laying the groundwork for the Resident Evil and the Survival Horror genre in general.

Characters & Inspirations 5: Papineau was named after a famous Quebec leader who led a rebellion in the 1800s. His name is culturally associated with wisdom - there's an expression that translates to "you don't need Papineau's head" to mean something isn't difficult or complicated (from the main developer)

Characters & Inspirations 6: The Gamer (door merchant) is the epitome of a "neckbearded gamer" stereotype—he talks about Gaming, Anime, and Swords (the trifecta); as well as wearing a Fedora + Trench Coat, the whole getup!

When he offers you the Katana for the Massacre Princess game back, he says it was given the name "Neko no Shoben", which he says translates to "Smile of the Jackal"... but it actually loosely translates to "Piss of the Cat" (poking fun at his lack of self-awareness)


References 1: The "Would you still love me if..." achievement name (and what happens at the end of the Nestor & Rafta side quest) is a reference to the "Would you still love me if I was a worm?" meme ( https://knowyourmeme.com/memes/would-you-still-love-me-if-i-was-a-worm )

References 2: {Meteor Strike} costing 999 STM absolutely seems to be a reference to Final Fantasy IV's Tellah having Meteo cost 99 MP, but only having 90 MP maximum! A sweet reference to one of the original "storytelling through game mechanics" classics!

References 3: The {Baseball Bat} being your first weapon (and also the mention of it being a "cracked baseball bat" alludes to an Earthbound reference, as that's Ness' same exact first weapon at the start. Also, enemies like the Tire Stack/Tirepede, Traffic Cone/Traffic Crab, etc. also seem to allude to Earthbound's strange sentient inanimate objects as enemies.

References 4: The video game {Wraithscourge} was named after 2 weapons in Hexen, the Wraithverge and the Bloodscourge! (from the official developer stream)

References 5: The music that plays in the elevator ("Interlude" in the OST) is extremely reminiscent of "The Girl from Ipanema", THE cliché elevator music song (probably because of its chill and laid-back vibe)
Easter Eggs & References 2
Development 1: It's been stated that when the "LISA: The Painful" and "Fear & Hunger" communities/fans got ahold of the original game jam demo, it greatly encouraged turning Look Outside into a full fledged release! You can find it available here on itch.io: https://frankiesmileshow.itch.io/look-outside


In-game Hints 1: You're given several hints that the {Cowboy Hat} before encountering Toxic Fred is bait!

If you're on the right side of the room behind the boxes, a Green Blob (very reminiscent of the Brain Slug from Futurama, no?) can be seen casually walking around on the table.

If you're next to the hat, there's some legs and a little green sticking out of it. Also, if you have a REAL {Cowboy Hat}, then the look of the item and the description is different!


Hopefully at least one of these tipped you off!

For an extra special interaction, try picking up the hat and selling it *before* speaking with Toxic Fred in the next room...


Music & Sound Effects: The noises the shadow creatures make (the ones that show up when out exploring for too long) are reversed audio Quebec profanity & swears said by Frankie himself! (from the official developer stream)


Locale & Setting: the game takes place in the city of Montreal (in the province of Quebec, Canada) It is never outright stated anywhere in the game, but there are several *hints* at where Sam's apartment building is located.

* Placide (the friendly water heater monster in the basement) mentions getting the water from the St. Lawrence River to service the building (and why you can still take hot showers!)

* There is also a fun little social cutscene with Morton in the kitchen involving a "I Heart Montreal" mug.

* "Papineau" is also named for famous Quebec leader from long ago, and he tends to say a lot of terminology very specific to the region like "tabarnak!" ( https://en.wiktionary.org/wiki/tabarnak ) as well as a lot of other French Quebec slang.

* The "Dollar Coin" and "Two-Dollar Coin" also allude to coins used for Canadian Dollars (CAD), both in their style and their usage!

* The cylindrical traffic cones in the Basement (B1), specifically their style and the sheer number of them, also allude to the city being Montreal; it jokingly referred to as the "cone capital of the world".

* The "Tuque" enemies in the F3 icy apartment are a reference to the Canadian English word of the same name (a derivative of the French word "toque") which is a fun colloquialism for beanies & knit caps!

* The "Trench Digger" boss has a Canadian flag on the side of their helmet.

* The friendly NPCs in the basement playing cards (Carlos, Laurent, & Rana) mention CEGEP, which is a public, two-year collegial institution that serves as a bridge between secondary school and university in the Quebec education system.

* If you say "Who are you?" to the Gun Trader who shows up at your door, he'll mention his "social security number" (SSN) Canada has a Social Insurance Number (SIN) instead. This heavily implies he's from the States, which also explains his absolute arsenal of an inventory!
Soundtrack & Locations
Here you can find quick links to individual songs, as well as the in-game locations where they are played! (in case you're not sure what it's called)


  1. Abberrations
    Boss Theme - Dream Eater, Spine Tingler, The Hundred Maws, & Crimson Scourge
  2. Abyss
    Area Theme - Before Meeting The Visitor
  3. Anxiety Release
    Area Theme - Basement
  4. apghdrls
    Area Theme - Glitch World
  5. Beautiful But Wrong
    Boss Theme - Stargazer
  6. Blood Ghoul Orgy 3
    Game Theme - Blood Ghoul Orgy 3
  7. Broken Promise
    Area Theme - Meat World
  8. Broken Window
    Area Theme - Golf Room (+ More)
  9. Catafalque
    Game Theme - Catafalque
  10. Cinnamon Sky
    Ending Theme - XIN-AMON
  11. Comatus
    Boss Theme - Swordmaster Comatus
  12. Crossword Challenge
    Game Theme - Auntie Wilma's Crossword Challenge
  13. Dawning
  14. Despair
    Area Theme - the F4 Metro and the B1 Pit
  15. Dissociation Intro
    Boss Theme - Face Taker (Phase 1)
  16. Dissociation
    Boss Theme - Face Taker (Phase 2)
  17. Distant Scream
  18. Doom
    Boss Theme - The Visitor
  19. Drowning
    Boss Theme - Drowning (Summer's Flooded Apartment 28)
  20. Duel For Atlantis
  21. Dusk Song
  22. Eugene's Home
    Area Theme - Eugene's Apartment
  23. Eviction
  24. Exposure
  25. Eye Of The Storm
  26. Eyes
    Boss Theme - Wounded Neighbor (Cursed Hard Mode)
  27. Fight
  28. Formaldehyde
    Boss Theme - Taxidermy (Phase 2)
  29. Fragmented
    Area Theme - Apartment 12
  30. Friendship
    Ending Theme - "True Final Ending"
  31. Frogit About It
  32. Guitar Medley
  33. Heart Beat
  34. Heartsigh
  35. Honko's Grand Journey
  36. Inferno
    Boss Theme - Furnace (Phase 2)
  37. Interlude
  38. Introspection
    Boss Theme - The Shadow ("Look Inside" Ending)
  39. Iron Crown (a.k.a. Rusty Crown)
    Boss Theme - Rat King
  40. Kill To Shoot
  41. Last Warning
  42. Lethargy
    Area Theme - Summer's Flooded Apartment 28
  43. Lost For Words
  44. Low Worm Dance
    Boss Theme - Lower Garbage Worm (B1)
  45. Madwheels 97
  46. Massacre Princess Catholicon
  47. Mutt's Fish And Chips
  48. Mycelium Dominion
  49. Myrmidon
  50. Myrmidon XII
  51. New Management
  52. New World
  53. Noise Zone
  54. Not Quite Right
  55. Octocook
  56. Oracle
    Event Theme - After giving Sybil the repaired {Telescope}
  57. Outside The Window
  58. Paying Rent
  59. Planetarium
    Area Theme - Apartment 12 Planetarium
  60. Promise
    Ending Theme - "Promise"
  61. Rent Interlude
  62. Rent Is Late
  63. Reptile Football
  64. Ride To Hell
  65. Ritual
  66. Rogue Taxidermy
    Area & Battle Theme - Taxidermy Apartment 30
  67. Run Away
  68. Safe At Last
  69. Safe Place
  70. Screamatorium
  71. Shadows
  72. Shellshock
    Boss Theme - Trench Digger
  73. Shimmering
  74. Simmer
    Boss Theme - Furnace (Phase 1)
  75. Smile
    Boss Theme - Grinning Beast
  76. Space Truckers
  77. Spooky Battle Baby
  78. Spooky Encounter
  79. Super Jumplad
  80. Super Jumplad 3
  81. Tension
  82. Terminus
  83. The Gaze
  84. The Window
  85. Vacant
  86. Verminator
    Area Theme - Rat Hell (Phase 2)
  87. Vertigo
  88. Wake The Blood Knight
  89. Welcome to Eugene's
  90. Whiskers Twitch
    Area Theme - Rat Hell (Phase 1)
  91. Whitemask
  92. Wizard's Hell
  93. Word Salad
    Boss Theme - Wilhelmina
  94. Worm Dance
    Boss Theme - Upper Garbage Worm (GF)
  95. Wraithscourge
  96. Zalmoxis
    Event Theme - Mazes & Wizards


Note: Please support the game further (if you can) by buying the soundtrack here! Many songs are still missing, but word on the official channels is that will be updated (eventually?)

https://proxy.yuanyoumao.com/app/3580350/Look_Outside_Soundtrack/
Credits & Outro
Francis Coulombe (the primary developer for the game) can be found regularly here:
https://www.twitch.tv/frankiepixelshow
and on the Frankietown Discord:
https://discord.gg/3JEVSjH
There's also an incredibly enlightening Devolver Podcast discussing the game here:
https://forkcast.devolverdigital.com/episodes/episode-180-just-dont-look
Check 'em all out when you get the chance - lots of very cool insights and folks!

Eric Shumaker composed the music, and assisted with much of the writing as well:
https://www.mobygames.com/person/734769/eric-shumaker/credits/
Probably best known for Barkley, Shut and Jam: Gaiden, as well as Katana Zero!

The artist for the *awesome* achievement images can be found here:
https://www.instagram.com/oasiscommander/

Dan, Sam (+ Rat Kid), and Sophie!


Major credits for additional details, guidance, and information in this guide:
  • TheChemicalCat (party recruitment)
  • Lord Tekron (party recruitment)
  • Gravity Eater (maps)
  • Naughty Maggot (challenges)
  • Cauvin (references)
  • And everyone in the comments!

Spot anything I missed, or found something you would like to add? If so, then please add a constructive comment or feedback, and I'll look into it when I get the chance!

Please do not copy without my permission! (I'm talking to you, random blogs online) If you'd like to support my work by buying me a coffee I'd greatly appreciate it! https://ko-fi.com/llamakazi

Want more? Then please check out my other:
  • Guides
  • Mods
  • Games[llamakazi.itch.io]
  • Videos (Note: Subscribing is currently the best way to support me, and it's free!)

Also if you can, please help out with this guide's overall visibility by hitting the Favorite & Like buttons up top - Cheers!
299 条留言
SkaFiend 5 小时以前 
Space Truckerz can be a reference to Space Rangers, a relatively obscure game from 2002, but it's a wild guess. Nothing points at it except this line "Space Truckerz is an extremely rare Czech space trucking simulator. Only 15 copies were ever released here, so it's considered a holy grail by some collectors." and its name.
Llamakazi  [作者] 6 小时以前 
@MightyCujoJr
Ah ha great catch! Another fun Frankie Easter Egg for the pile =)
I'll add it to the Guide, thanks!

@Nebnii
Bummer if the achievement is a little buggy; I'll update the description a little bit to make sure folks make a hard save before trying to take out all the worm parts

@Captain Trash
Also a good catch! I'll update it appropriately, thanks!
Captain Trash 7 小时以前 
@Llamkazi Hey loved this guide it was so helpful. I think it's important to note that for Suit of Shame you can still get it like you said if Nestor takes over, but if you leave the shop he can lock it and say "I need to redecorate". If he does, he gunks up the bookshelf and you can't push it to loot the rest of the apartment, making the achievement inaccessible. So if you activate Nestor's head, only enter the shop when you are ready to kill him!
Nebnii 9 小时以前 
For those having trouble with syncope not triggering, what worked for me was to leave the head to be killed last. I messed around with him, exausted his dialogue and left the room and rentered and it finally triggered the achievement after i killed him.
MightyCujoJr 23 小时以前 
Gameplay easter egg: If your name contains the word "lumpy", your character is put in the strait jacket and you can't take it off (along with some additional dialogue from Sybil). This is obviously a reference to lumpy touch along with his associated prisoner room.
Llamakazi  [作者] 11 月 26 日 上午 12:18 
@The Enemy Stand User
Lovely! I'll update that ending description to help more folks in the future, cheers! :spelunky:
The Enemy Stand User 11 月 25 日 下午 8:05 
Ah yes that was the issue. My weapon broke every time and I was doing like 30 damage a turn so I guess he has a turn threshold where he will just obliterate you after enough have passed and skip his dialogue.
Made sure he had a weapon and spammed high damage moves, got the ending to trigger.
Thank you so much! 10/10 guide:steamhappy:
Llamakazi  [作者] 11 月 25 日 下午 4:55 
@The Enemy Stand User
How much damage are you doing with each attack? Looks like you indeed have to hit certain thresholds before it will react appropriately... (my most recent attempt I was doing 300+ damage a turn)
The Enemy Stand User 11 月 25 日 下午 1:39 
I’m attacking every turn. And it will be multiple turns before he says something new. It wasn’t doing this before the update.
I think it might have a damage threshold before he says stuff again because if you don’t do anything he just sits there.
I’ll probably just have to make a new save
Llamakazi  [作者] 11 月 25 日 上午 9:53 
@Pumpkinreaper
Yeah I booted up a save with that item and you're right! Strange... also noticed it doesn't clear the new glitch status effects either

@The Enemy Stand User
Hmmm... It should have something new to say every single turn until the "I'm going to make you disappear" line (the trigger for the Skill discount) Are you attacking it every turn or guarding or something else?